Add Web Parts |
2024-04-16 |
Once you've created a project or folder you can begin building dashboards from panels called Web Parts. Web Parts are the basic tools of the server -- they surface all of the functionality of the server including: analysis and search tools, windows onto your data, queries, any reports built on your data, etc. The list of web parts available depends on which modules are enabled in a given folder/project.There are two display regions for web parts, each offering a different set. The main, wider panel on the left, where you are reading this wiki, and a narrower right-hand column (on this page containing search, feedback, and a table of contents). Some web parts, like Search can be added in either place.


Add a Web Part
- Navigate to the location where you want the web part.
- Enter Page Admin Mode to enable the page editing tools.

- Scroll down to the bottom of the page.
- Choose the desired web part from the <Select Web Part> drop down box and click Add.
- Note: if both selectors are stacked on the right, make your browser slightly wider to show them on separate sides.
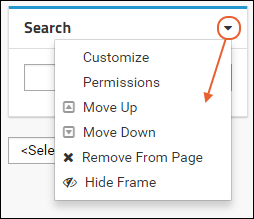
- The web part you selected will be added below existing web parts. Use the (triangle) menu to move it up the page, or make other customizations.
- Click Exit Admin Mode in the upper right to hide the editing tools and see how your page will look to users.
Note: If you want to add a web part that does not appear in the drop down box, choose (Admin) > Folder > Management > Folder Type to view or change the folder type and set of modules enabled.