When you "publish" a study, you select a subset of its data, typically with the intention of allowing broader access to your research, for example, to colleagues working in a related field, or to the general public. A published study becomes a new study folder on your server; by default a child folder of the source study.
Publish Selections
You can select narrowly or broadly from the data in the source study. For example, you might select just a few participants and time points to be included in the published study; or you might select the majority of the data, leaving out just a few distracting elements. Select any subsets from the following aspects of the source study:
- Participants
- Datasets
- Timepoints
- Visualizations and Reports
Note that publishing a study is primarily intended for presenting your results to a new audience; if you intended to engage in continued research and/or test new hypotheses, consider creating an
ancillary study.
What Happens When You Publish a Study?
Data that is selected for publication is packaged as a new study in a new folder. The security settings for the new folder can be configured independently of the original source folder, allowing you to maintain restricted access to the source study, while opening up access to the new (published) folder. By default, the new folder inherits its security settings from its parent folder.
Protected Health Information
You can provide another layer of security to the published data by randomizing participant ids, dates, and clinic names. You can also hold back specified columns of data based on the level of PHI (Protected Health Information) they represent.
For details see
Publish a Study: Protected Health Information / PHI.
Publish a Study
To publish a study, follow these instructions:
- In the study folder, click the Manage tab.
- Click Publish Study.
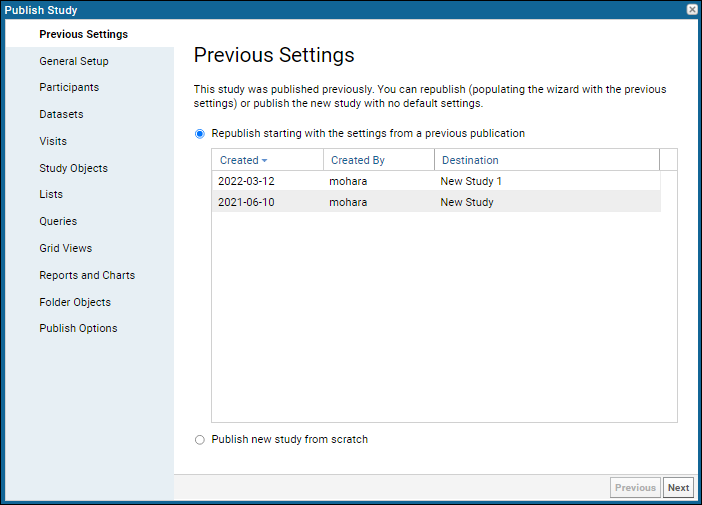
- Note: If previous studies were already published from this one, you will have the option to use Previous Settings as defaults in the wizard.
Use the
Publish Study wizard to select desired options, clicking
Next after each panel.
- Publish Options: For information about these options, see [studyPubPHI">Folder Objects.
- Use Alternate Participant IDs
- Shift Participant Dates
- Mask Clinic Names
- Include PHI Columns: Select the level of PHI to include in the published study.
- Click Finish to create the published study.
- The published study is created by the data processing pipeline. When the pipeline job is complete, you can navigate to the published study by clicking Complete in the Status column, or by using the project/folder menu.
Republish a Study
When you republish a study, you have the option of starting from the setting used to publish it earlier. For example, an administrator might use exactly the same settings to republish a study with corrected data, or might update some settings such as to publish a 36-month snapshot of a trial in the same way as an 18-month snapshot was published.
- Return to the original source study used above. Click the Manage tab.
- Click Publish Study.
- The first option in the publication wizard is to select either:
- Republish starting with the settings used for a previously published study: Click one from the list.
- Publish new study from scratch.

- Click Next and continue with the wizard. The previous settings are provided as defaults on each panel.
- You may want to step through and confirm your intended selections. It is possible that options may have moved from one publish wizard category to another since the original publication.
The same option to use prior settings is provided for creating ancillary studies, though you cannot use settings from a previously published study to create an ancillary study or vice versa.
Study Snapshot
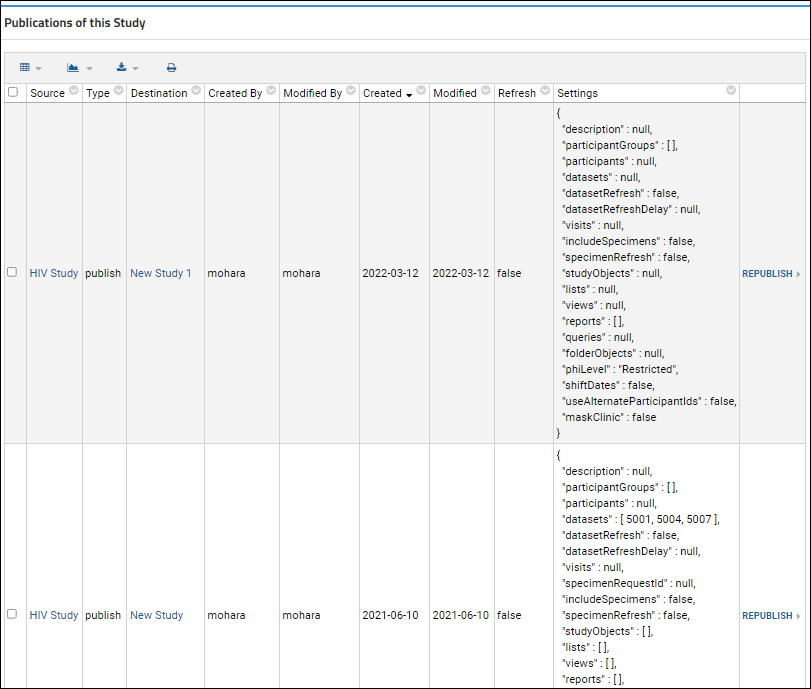
Information about the creation of every ancillary and published study is stored in the study.studySnapshot table. Only users with administrator permissions will see any data. You can view this table in the schema browser, or add a query web part to any tab.
- Return to the home page of your study.
- Enter > Page Admin Mode.
- Select Query from the Select Web Part dropdown in the lower left and click Add.
- Give the web part a title.
- Choose the schema "study" and click "Show the contents of a specific query or view".
- Select the query: "StudySnapshot" and leave the remaining options at their defaults.
- Click Submit.
- The default grid includes a column showing all the settings used to publish the study.

You can
republish a study using any of the links in the study snapshot.
Related Topics