Instrument data on its own can hold a great deal of information, but can become even more useful when integrated with other data about the same participants or specimens. From an assay alone, you might learn a lot about how a blood marker changes over time, for example, but being able to connect that the trend is quicker for patients receiving a certain treatment and slower for another could more directly lead to improved patient outcomes.
LabKey Studies offer a wide range of integration, analysis, and modelling tools for participants over time, and we can integrate assay data into that framework as well.
The "Copy-to-Study" process is the mechanism for integrating instrument assay data with other study information, allowing you to:
- Easily integrate assay data with other assay and clinical data.
- Create a broader range of visualizations, such as time charts.
- Utilize qc and workflow tools.
You can see an example of this process in the
Assay Tutorial.
What Copying Happens During this Process?
Despite the name, your assay data is not duplicated in any way. Assay data records are mapped to VisitID/ParticipantID pairs either manually or using
participant/visit resolvers. The assay data is then linked to the study dataset as a
lookup.
Manual Copy of Assay Data to a Study
Automatic Copy-to-Study Upon Import
By default, assay data must first be imported and then, as a second step, manually selected and copied to a study. You can change this default behavior to have assay data copied automatically as part of the original data import.
- Navigate to your Assay Runs page.
- Click Manage Assay Design > Edit Assay Design.
- Placed a checkmark next to Auto-copy Data.
- Select a target study from the Auto-copy Target dropdown list.

View Copied Datasets
After you have successfully copied an assay's data to a study dataset, your new dataset will appear at the bottom of the list on the
Clinical and Assay Data tab in the target study. Click the title to see the data; the "Assay" link preceding each record will take you to the source assay for that data record.
Recall Copied Rows
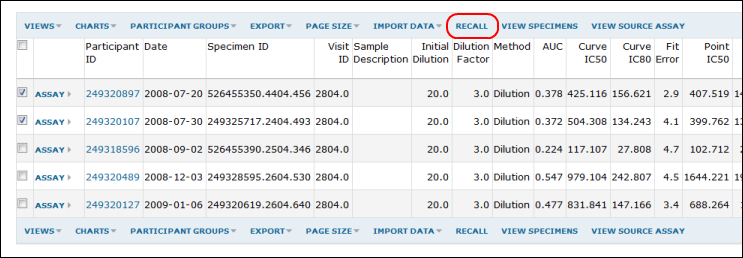
If you have permission to delete from the assay's dataset in a particular study, you can also recall rows from the dataset's grid view. Select one or more dataset rows and click the
Recall button on the tool bar.

View Copy-to-Study History
Please see
Copy-To-Study History to learn how to view the publication history for assays or datasets.
