Introducing new users to a new application or interface can be aided by providing pop-over annotations giving a self-guided tour of a page, project, or folder. Highlight important features, point out where to begin, and give a quick click through introduction to new content. Tours are defined in JSON using Hopscotch.
Tour Overview
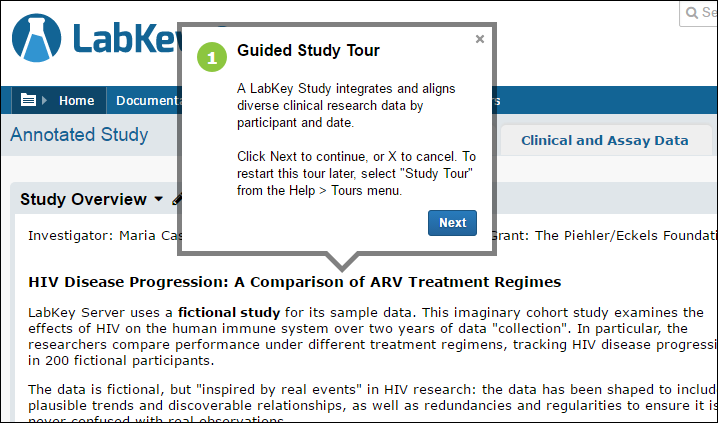
The tour annotations appear as pop over 'bubbles' above the page contents. Each can be dismissed using an X or may contain one or more action buttons. Typically, click next to go to the next tour annotation. A tour may provide a series of annotations which change pages or tabs within a folder, or change folders within a project.
Once defined, tours can be run by selecting
Help > Tours > [name of tour]. Each may also be
configured to run automatically when a user reaches the folder.
To see an example tour of a LabKey demo study, visit this project in another browser window:
Annotated Study.

Tour Builder
The tour builder allows an administrator to create, edit, export, and import tours. Navigate to the project or folder of interest and open the list of available tours:
- Select Admin > Developer Links > Schema Browser.
- Open the announcements schema.
- Select Tours.
- Click View Data.
Build a Tour
Above the list of available tours, select
Insert > Insert New Row. Note that if any tours are set to "Run Always" they may also run in the tour builder UI, depending on selectors they use. Simply click the X in the first box to stop the tour.

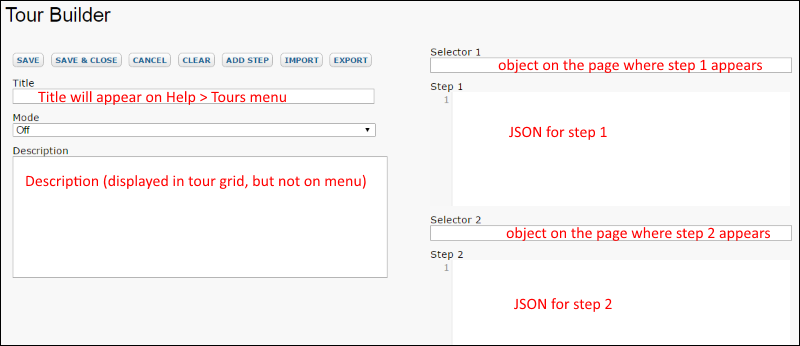
- Title: Enter a title for your tour. The title will be displayed in the Help > Tours menu.
- Description: Enter a description, which will only be shown in the grid of tours and within the builder.
- Mode: Select whether you want your tour to run automatically. No matter what this setting, the user can always run a tour from the help>tours menu. Options are:
- Run Always: Each time the user reaches the container, the tour will run.
- Run Once: Run it the first time the user reaches the container.
- Off: Never run unless the user selects it from the menu. This option may be the most practical during development.
Selectors and Steps
The body of the tour is defined in a numbered series of steps. Each step is accompanied by an HTML selector which defines what element of the page it is attached to. In a typical annotation, the popover annotation may "point" to the selector element, though you have the option to adjust position/location/direction of pointers and bubbles in a variety of ways relative to the chosen selector. Identify your selector by using "right click>Inspect" in your browser.
For example, the selector for the first step in the study tour is "td.study-properties"; the content of the Study Overview web part which appears in HTML as <td class="study-properties" valign="top">.
The definition of the step includes using options to place the bubble on top of the element, offset the position by an X and Y value and center the arrow in the center:
{
	content: "<br>Welcome! <br> A LabKey Study integrates and aligns diverse clinical research data...",
	placement: "top",
	xOffset: 150,
	yOffset: 50,
	arrowOffset: "center",
	title: "Guided Study Tour"
}
If you run the
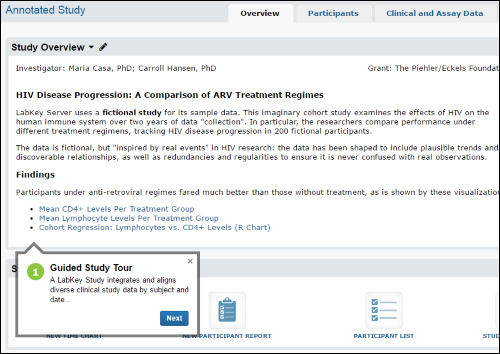
Help > Tours > Study Tour-old in the same folder (after clicking X to exit the main tour), you will see the default position of the bubble for the same td.study-properties selector is below, and left-justified with a left-justified pointer.

For more about the options available in step definitions, see
the Hopscotch options list.
To have a tour span multiple pages, the step before the page switch should include "multipage:true" and define "onNext". For instance, the second step in the sample tour shows the Study Navigator; clicking Next moves the tour to the Participants tab for the third step. The second step definition is:
{
    content: "<br>Visual overview of study progress and data...." ,
    placement: "left",
    title: "Study Navigator",
    multipage: true,
    yOffset: -20,
    arrowOffset:60,
    onNext: function (){LABKEY.help.Tour.continueAtLocation
        ('/project/home/Study/Annotated%20Study/begin.view?pageId=study.PARTICIPANTS');}
}
Export/Import/Edit a Tour
Export a Tour
Exporting the JSON for a tour gives you a convenient way to jumpstart the process of creating additional tours. Click
Export for the tour we just created. A popup window showing the tour definition will appear. Copy the contents of that window to your browser clipboard or an offline file.
Import a Tour
Import the tour we just exported into a new tour.
- Return to the tours view and select Insert > Insert New Row.
- Click Import.
- Paste the exported tour into the popup window.
- Click Import.
- The imported tour will populate the builder.
- You may need to change the name of the "newly imported" tour to avoid overwriting the old one.
- Click Save and proceed to edit, or Save and Close.
Edit a Tour
Click
Edit for the tour. Make changes as needed.
Clicking
Add Step will add a new empty selector and step at the end of the existing tour.
If you need to reorder the steps in a tour, add an additional one early in a long tour, or remove one or more from the middle, the easiest way to do so is to export the tour, make changes directly in the JSON export, and reimport with the steps in the new order.