This topic covers some tips and tricks for successfully importing data to LabKey Sample Manager. These guidelines and limitations apply to uploading files, data describing samples and sources, and assay data.
Use Import Templates
For the most reliable method of importing data, first obtain a template for the data you are importing. You can then ensure that your data conforms to expectations before using either
Add > Import from File or
Edit > Update from File.
For
Source Types, Sample Types, and Assay Results, click the category from the main menu. You'll see a
Template button for each data structure defined.
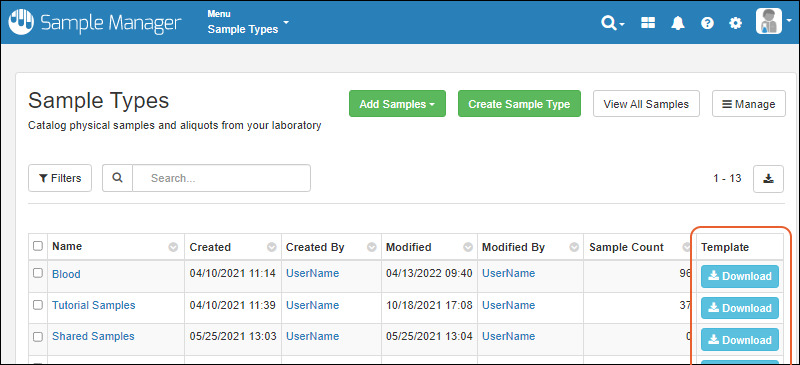
You can also find the download template button on the overview page for each Sample Type, Source Type, Assay for downloading the template for that structure:

In case you did not already obtain a template, you can also download one from within the file import interface itself:
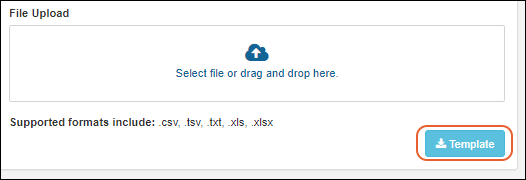
Use the downloaded template as a basis for your import file. It will include all possible columns and will exclude unnecessary ones. You may not need to populate every column of the template when you import data.
- For a Sample Type, if you have defined Parent or Source aliases, all the possible columns will be included in the template, but only the ones you are using need to be included.
- In cases of columns that cannot be edited directly (such as the Storage Status of a sample, which is defined by a sample having a location and not being checked out), these columns will be omitted from the template.
- Note that the template for assay designs includes the results columns, but not the run or batch ones.
Background Import (Asynchronous Import)
When import by file is large enough that it will take considerable time to complete, the import will automatically be done in the background. Files larger than 100kb will be imported asynchronously. This allows users to continue working within the app while the import completes.
Import larger files as usual. You will see a banner message indicating the background import in progress, and a
icon alongside that sample type until it completes:

Any user in the application will see the spinner in the header bar. To see the status of all asynchronous imports in progress, select
> View all activity (this menu may be a spinner when imports are in progress).
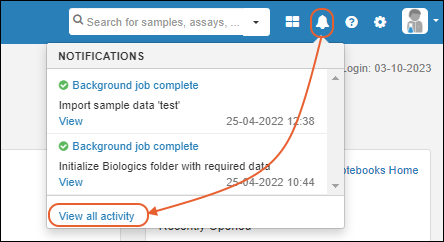

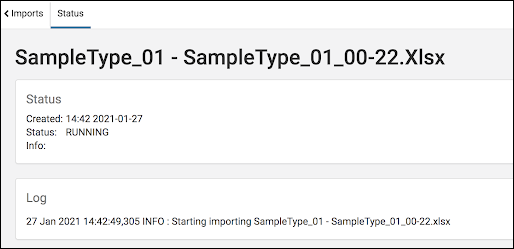
Click a row for a page of details about that particular import, including a continuously updating log. Select and click
Cancel if you want to stop a long running job here.
When the import is complete, you will receive an
in-app notification via the menu.
Import Performance Considerations
Excel files containing formulas will take longer to upload than files without formulas.
The performance of importing data into any structure is related to the number of columns. If your sample type or assay design has more than 30 columns, you may encounter performance issues.
Batch Delete Limitations
You can only delete 10,000 rows at a time. To delete larger sets of sample or assay data, select batches of rows to delete.
Column Headers
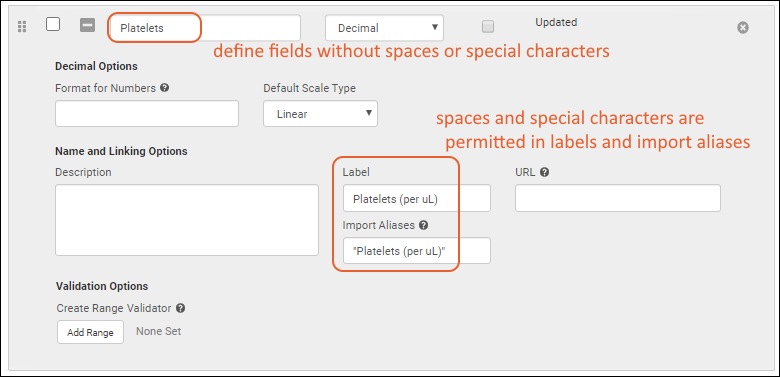
Data column headers should not include spaces or special characters like / or \ slashes. Instead of spaces or special characters, try renaming data columns to use CamelCasing or '_' underscores as word separators. Displayed column headers will parse the internal caps and underscores to show spaces in the column names.
Once you've created a sample type or assay data structure following these guidelines, you can
change the Label for the field (under Name and Linking Options in the field editor)) if desired. For example, if you want to show a column with units included, you could import the data with a column name of
Platelets and then set the label to show "Platelets (per uL)" to the user.
You can also use
Import Aliases to map a column name that contains spaces to a sample type or assay field that does not. Remember to use "double quotes" around names that include spaces.
For example, if your assay data includes a column named "Platelets (per uL)", you would define your assay with a field named "Platelets" and include "Platelets (per uL)" (including the quotes) in the
Import Aliases box of the assay design definition.
Data Preview Considerations
Previewing data stored as a TSV or CSV file may be faster than previewing data imported as an Excel file, particularly when file sizes are large.
Previewing Excel files that include formulas will take longer to preview than similar Excel files without formulas.
Reserved Fields
There are a number of reserved field names used within LabKey for
every data structure that will be populated internally when data is created or modified, or are otherwise reserved and cannot be redefined by the user:
- Created
- CreatedBy
- Modified
- ModifiedBy
- RowId
- LSID
- Folder
- Properties
In addition,
Sample and Source Types reserve these field names:
| Sample Type | Source Type |
|---|
| Name | Name |
| SampleId | SourceId |
| Description | Description |
| SampleState ("Status") | |
| MaterialExpDate ("Expiration Date") | |
| Flag | Flag |
| SourceProtocolApplication | |
| SourceApplicationInput | |
| RunApplication | |
| RunApplicationOutput | |
| Protocol | Protocol |
| Alias | Alias |
| SampleSet | DataClass |
| ClassId |
| Run | |
| genId | genId |
| Inputs | Inputs |
| Outputs | Outputs |
| | DataFileUrl |
| | QueryableInputs |
| SampleCount | |
| StoredAmount ("Amount") | StoredAmount ("Amount") |
| Units (units associated with the StoredAmount field) | |
| SampleTypeUnits (units associated with the Sample Type) | |
| RawAmount: See below | |
| RawUnits: See below | |
| FreezeThawCount | |
| StorageStatus | |
| StorageLocation | |
| StorageRow | |
| StorageCol | |
| CheckedOutBy | |
| CheckedOut (Date) | |
| IsAliquot | |
| AliquotCount ("Aliquots Created Count") | |
| AliquotTotalVolume | |
Inferral of Reserved Fields
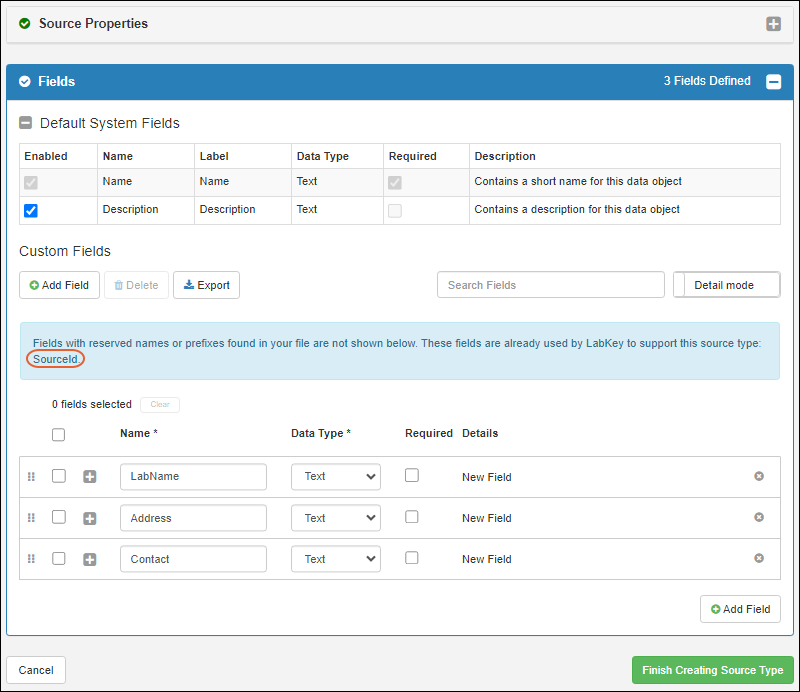
If you infer a data structure from a file, and it contains any reserved fields, they will not be shown in the inferral but will be created for you. You will see a banner informing you that this has occurred:
Import to Unrecognized Fields
If you import data that contains fields unrecognized by the system for that data structure (sample type, source type, or assay design), you will see a banner warning you that the field will be ignored:
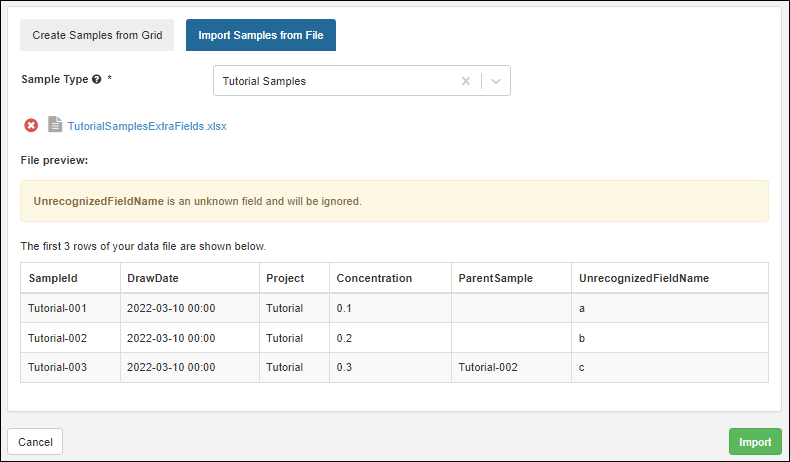
If you expected the field to be recognized, you may need to check spelling or data type to make sure the data structure and import file match.
Migration of Inventory Fields
In version 23.4, some fields from the
inventory schema have been migrated and renamed. If you happen to be using the new names in your system as well, this migration can cause conflicts. It is recommended that you keep these field name changes in mind. If you are using any fields listed below for your own purposes, you should rename them prior to upgrading:
| Old Field | Action Taken | New Field |
|---|
| inventory.item.volume | migrated (with existing data) | exp.materials.StoredAmount |
| inventory.item.volumeUnits | migrated (with existing data) | exp.material.Units |
| inventory.item.initialVolume | removed | |
Amount/Units Display Details
The StoredAmount column is labeled "Amount"; the Units field is labeled "Units". Importing data via a file will map either "Amount " or "StoredAmount" to the StoredAmount field.
Both the "StoredAmount" and "Units" fields have display columns attached to them. When a Sample Type also has a display unit defined, the value displayed in the "StoredAmount" column will be the amount converted to those units. Because the display column prevents users from seeing the data as entered, we also provide two new columns "RawAmount" and "RawUnits", which present the data as stored in the database. These columns are hidden by default but can be added via customizing a samples grid.
Import of Samples and Sources via API
Sample Types and Sources are similar, with a few key differences. Sources are "data classes". Upload source data to the "
exp.data" schema.
Sample Types are defined in the "exp" experiment schema, and some access to data will be through the "exp.materials" schema. However, all sample data should be uploaded to the "
samples" schema.
Related Topics
 In case you did not already obtain a template, you can also download one from within the file import interface itself:
 Any user in the application will see the spinner in the header bar. To see the status of all asynchronous imports in progress, select > View all activity (this menu may be a spinner when imports are in progress).
 When the import is complete, you will receive an in-app notification via the menu.