Premium Feature — Available in the Professional Edition of Sample Manager and with the Starter Edition when used with a Premium Edition of LabKey Server.
Learn more or
contact LabKey.
This topic describes how to import assay data about your samples. You should already have
defined the assay structure of your data and how it will map to your samples.
You can follow this topic to upload our example data to the "Tutorial Assay"
once you have created it.
Note that our assay data assumes you have followed
the previous tutorial steps and already created enough samples in the "Tutorial Samples" Sample Type to have the Sample IDs "Tutorial-003" through "Tutorial-012" available to associate with our data. You can confirm this by selecting
Tutorial Samples from the main menu and
add more if necessary.
Import Data
Select the assay design you want from the main menu.
To start the import, click
Import Data.

Enter Run Details
Enter the
Run Details requested.
- Any fields that are required will be marked with an asterisk (the getting started tutorial does not include any required fields).
- The Assay Id field will be the name for this run of data. If you don't enter a name here, an Assay ID will be generated for you. If you upload a data file, the filename will be used. Otherwise, it will be a concatenation of the assay design name and the date and time.
- The Workflow Task field can be used to associate this assay run with a specific workflow task if appropriate.
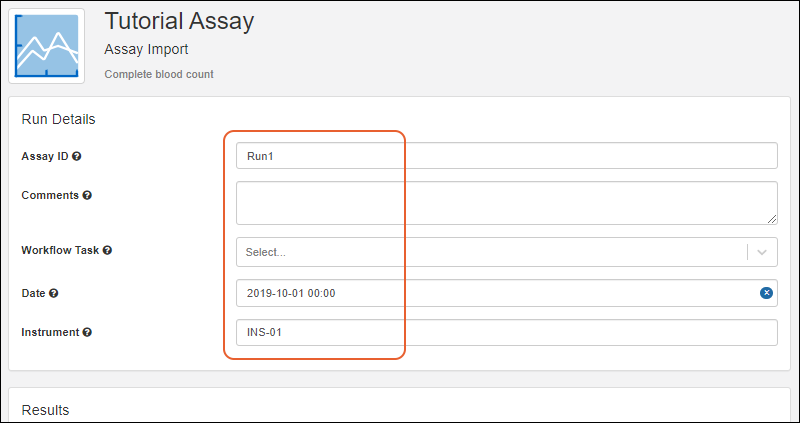
For the getting started tutorial, enter:
- Assay Id: "Run1"
- Date: "2019-10-01" (the time "00:00" will autopopulate if you don't select a time)
- Instrument: "INS-01"
Enter Data (Results)
You can enter the result data in one of two ways:
Import Data from File
You may want to first
download a template file of the expected format by clicking
Template, then populate it.
Drag and drop the file(s) containing your result data into the target area or click the region to select a file.

The first three rows of data will be shown for a quick verification before you upload. If any fields are
unrecognized, they will be ignored and a banner will be shown.
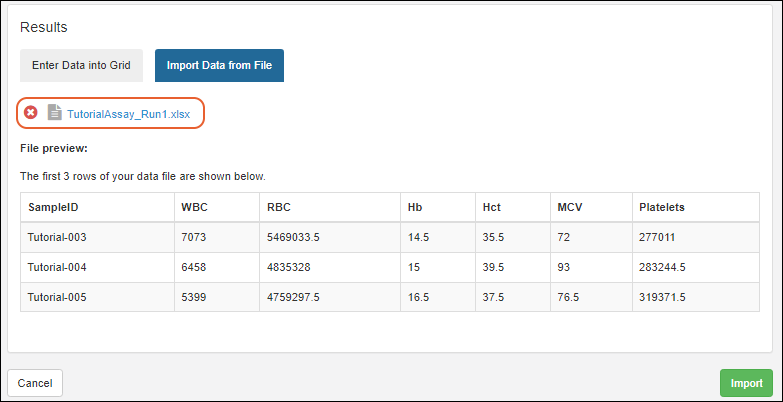
If everything looks as expected, click
Import to import the data. For large files (over 100kb), you may see a notice that your import will be done in the background, freeing you to continue using the app for other use. Learn more about
background imports in this topic.
Enter Data into Grid
If neither method described above is appropriate, you can use the
Enter Data Into Grid tab to type directly into the entry window. Start by adding the number of rows you want to add and clicking
Add row(s).
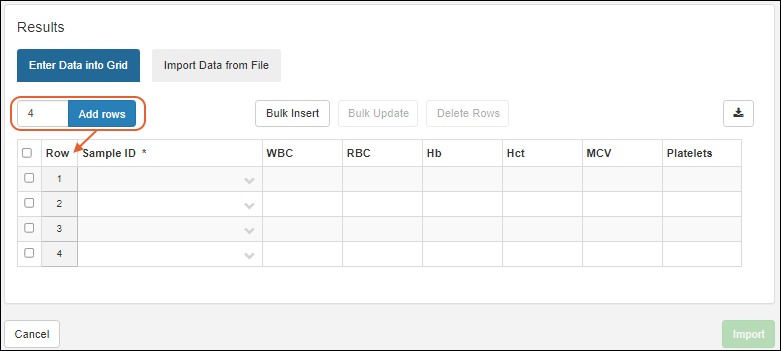
Enter values directly into the grid. Any columns that are required, including the sample mapping field (SampleID), will be marked with an asterisk (*). Before you can import the data, these columns will need a valid value in every row.
Fields which show a
indicator let you choose from the dropdown menu, or start typing to narrow the options. You can enter a text or number sequence, then
drag to populate the rest of the column.
At any point you can click
to download the contents of the editable grid in CSV, TSV, or Excel format. This can make it easier to complete your import using Excel or similar methods, then reimport it from a saved file.
Learn more about using editable grids in this topic:
Data Grid Basics
Bulk Insert
You can also use the
Bulk Insert button to prefill the grid with many rows of data with some or all values in common. Enter the number of rows to add and provide values that those rows should share. You do not need to enter a value for every column.
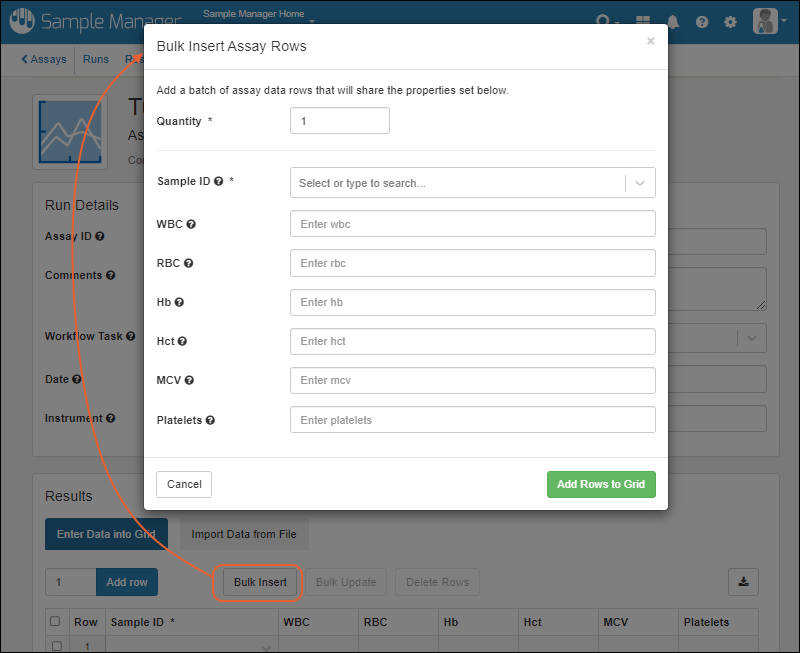
After bulk inserting rows, you can hand edit as needed in the grid view.
Bulk Update
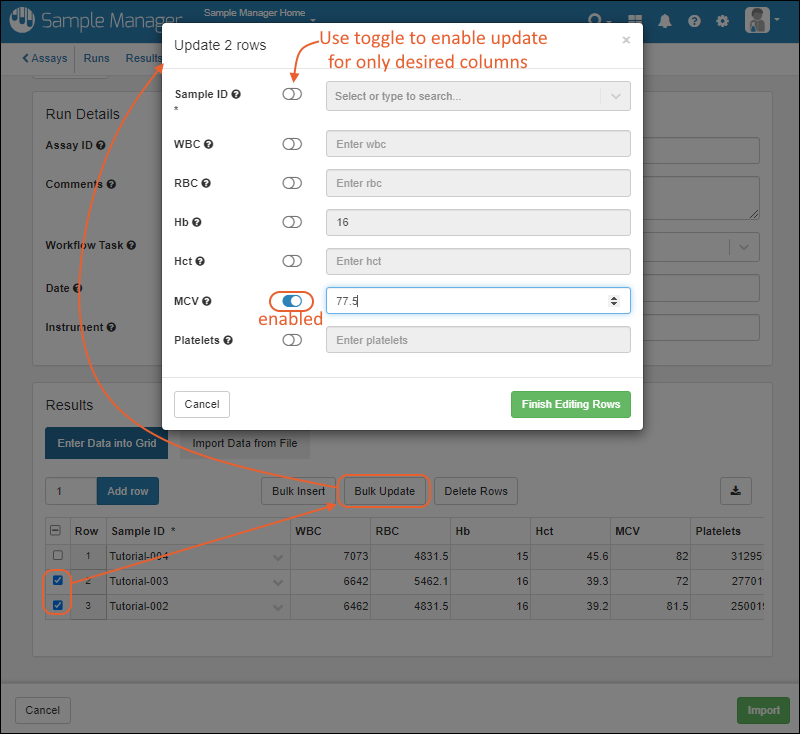
Once data has been entered into the grid, either directly or using bulk insert, you can select one or more rows and click
Bulk Update to assign new values to all the selected rows for one or more columns. In the popup, use the slider to enable the updating of a row and enter the new value. Values in columns which are disabled in the update will remain unchanged. Any values shared by all the selected rows (such as "Hb" here) will be shown.
Delete Rows
If you enter extra rows by mistake, you can select them using the checkboxes and click
Delete Rows.
Complete Import and Review Data
Click
Import when ready to import. If there are any missing or invalid values, you will need to fix them before the import will complete.
When your data has been imported, you will see the results for the specific run you just entered. Run details are at the top, results in a grid below.
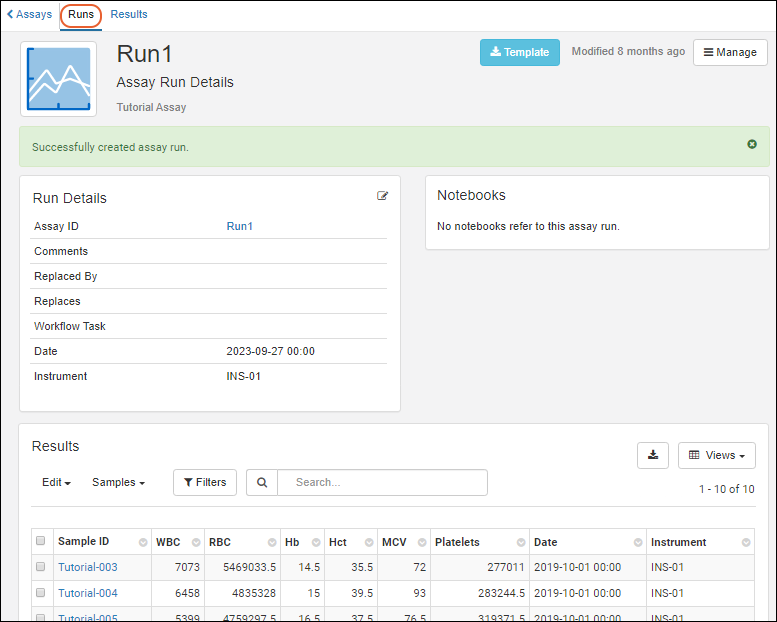
The results grid can be searched, sorted, and filtered. Learn more in the topic:
Data Grid Basics
Related Topics