Workflow jobs organize related tasks into a sequence of work to be completed. A set of samples to be worked on can be associated with the job, and it can include direct links to upload data for the necessary assay tests performed on those samples. You can start by selecting samples directly from a grid, or use a
picklist as a starting place.
Administrators and users with the
Workflow Editor role can create and edit workflow jobs and tasks.
To start a job, you can either start by selecting the samples you want worked on, or add them to the job later. It's also possible to have jobs that do not involve samples, if that supports your lab workflow.
Start a Job
There are several ways to open the job creation wizard:
- From the home page, click Start a New Job.
- From the main menu, choose Workflow, then click Create Job.
- Select some samples, then use Jobs > Start a New Job from any Sample or Picklist grid. On narrower browsers, this option will be under the More > menu.
This final option is described next. If you are creating a job without pre-selecting any samples, skip ahead to the
Job Details section.
Start a Job with Selected Samples
If you already know the set of samples you want to include, start from the Sample Type grid, storage view, or from a
picklist containing the desired samples. This walkthrough illustrates using the Sample Type grid, but the process starting from other lists of samples is the same.
- Select the sample type of interest from the Sample Types section of the main menu.

- Use filtering and checkboxes to select the Samples of interest.
- Select Jobs > Start a New Job from the menu above the grid. On narrower browsers, this section will be under the More > menu.

Job Details
On the first panel of the job creation wizard, enter details about the job:

- Job Name: Provide a name for the job, or leave blank to have one generated for you.
- Description: Include a description. Note that to include a newline, you must use Shift-Enter; using Enter without Shift will save the description value as a single line.
- Job owner: This can be the user who "owns" the overall job completion, or the user to whom you assigned the first task.
- Notify these users: Add users who should get notifications as this job progresses.
- Job start and due dates: Use the date picker to select the begin and end dates.
- Priority level: Use the pulldown menu to select one of the options:
- Attachments: Select or drag and drop any files needed for the job. For example, an SOP document, labels, or other instructions related to the job could be included here.
- Any files you upload will be listed; if you need to delete one, click the to remove it.
Tasks
Click the
Tasks section to open it.
Any job can be composed of several tasks to complete in sequence. Click
Add Task to add each task and click to open the details panel.
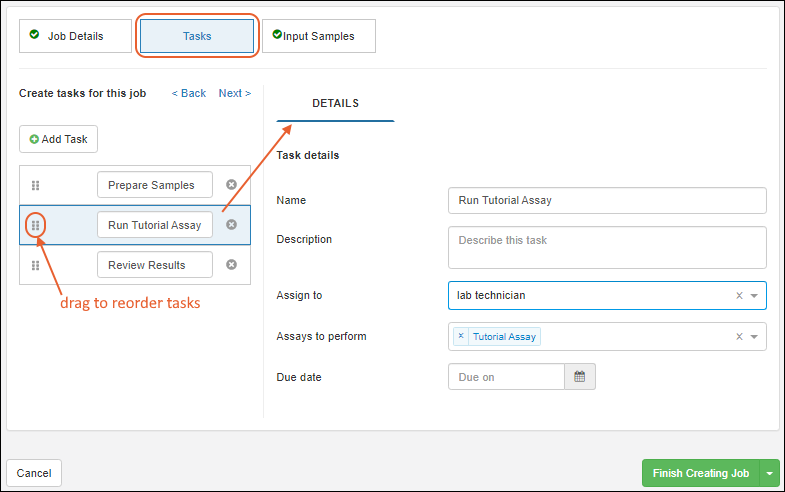
For each task in your job, enter the details:
- Name
- Description: Note that to include a newline in your description, use Shift-Enter; using Enter without Shift will save the value.
- Assign to
- Assays to Perform (select as many as required for this task)
- Due date
Use the six block handle on the left to reorder the tasks. Click
to delete a task.
Once you have added tasks to a job, the button near the top to
Save as Template will be activated. If you want to
save the current set of tasks as a new named template, click this button. Note that this will exit the job creation editor and a new job will
not be created at this time.

Input Samples
Click the
Input Samples section to open it. If you created this job from a set of samples, it will open on the
Included Samples tab and you will see them listed. If not, skip ahead to
search for samples
Included Samples
- Review the listed set of included samples; if necessary select one or more rows and click Remove from Job to remove them.

- If you like, you can use the Search for Samples tab (described below) to add more samples.
- When you are satisfied with the selection of samples, skip to the Finish Creating Job section.
Search for Samples
- If you did not start creating this job from a selection of samples, when you open the Input Samples panel, click the Search for Samples tab (if it is not open by default).
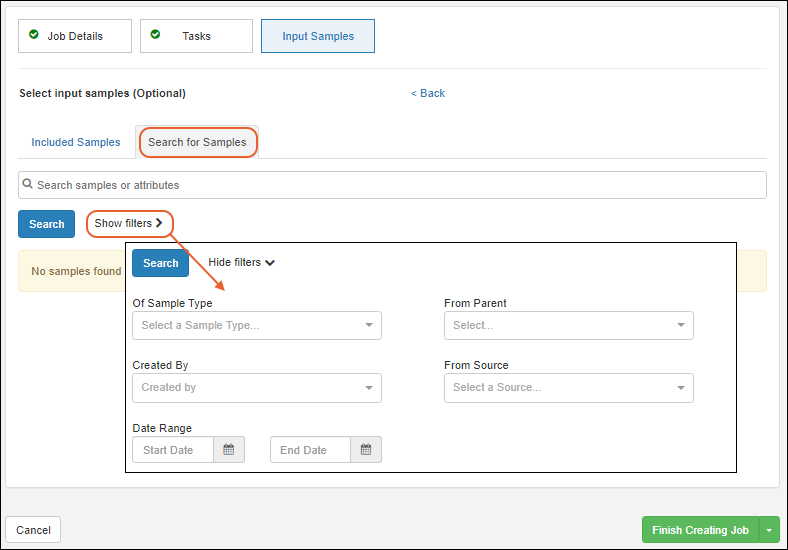
- You can search for names or attributes in the search box. Click Search.
- Click Show Filters to see a set of selectors for filtering to find the samples you want. Options:
- Of Sample Type
- Created by
- From Parent
- From Source
- Date Range From/To
- Make selections for some or all filters, then click Search. This will populate the search results in a grid below the filter section.
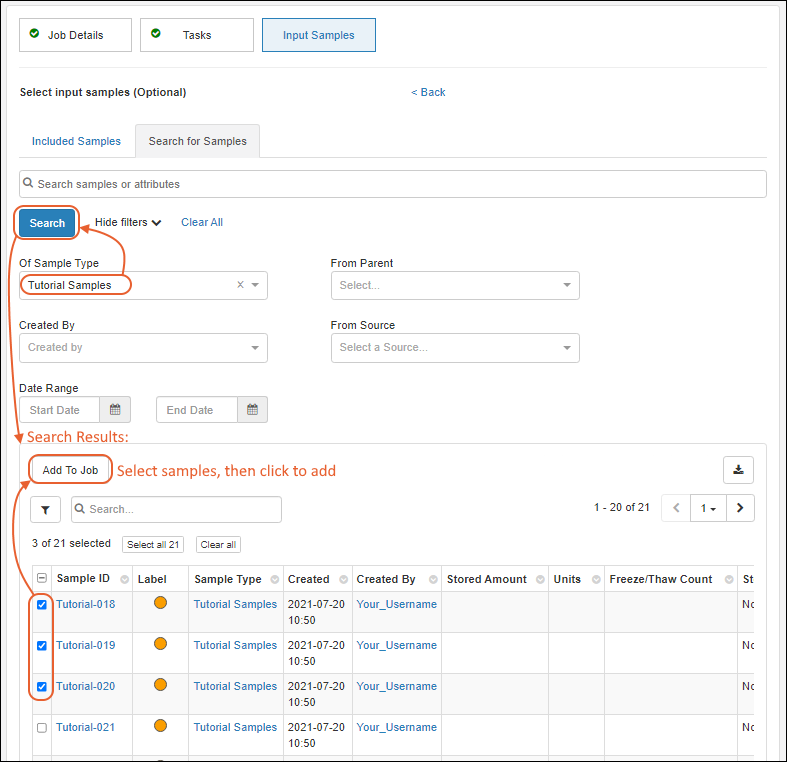
- Scroll, or use filters and sorts to find desired samples.
- Check the boxes to select the samples you want to include. Once samples are selected, the "Add to Job" button will be activated.
- Click Add to Job.
Now, if you click the
Included Samples tab, you will see the samples you added. You can return to
Search for Samples again if you need to add more.
Finish Creating Job
Before finishing job creation, consider whether you want to make the details, tasks, and files of this job available as a template for creating similar future jobs. Samples are never part of job templates.
Creating a template from a job is offered only during initial job creation.
- Click Finish Creating Job to start the job without creating a template.
- Use the dropdown menu option Save as Template and Start Job to create a template and start this job.
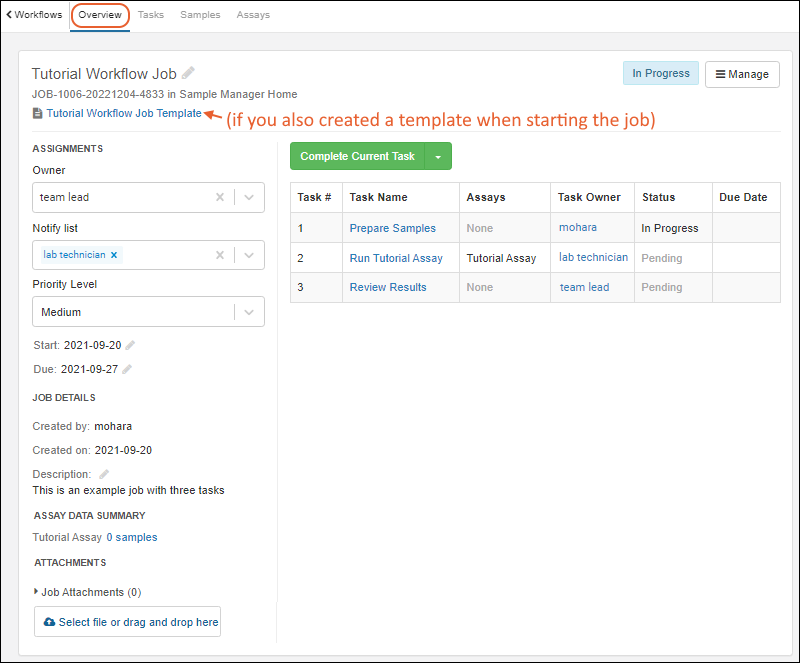
Once the job is started, you will see the job overview. Note the tabs along the top edge for viewing
Tasks, Samples, and Assays in addition to the
Overview.
Create Template from Job
As you finish creating a job, you could select either one of two alternate ways to save the job as a template. Once the job has been started, you cannot generate a template from it.
- Save as Template
- Save as Template and Start Job

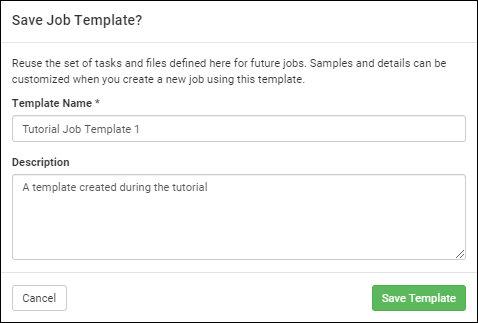
Either of these options will turn the task sequence you just created into a template that can be used to create future similar jobs. In a popup, you will name the template and provide an optional description.
Learn more about creating job templates in this topic:
Create a Job Template
Create Job From Template
You can create a job from a template you have already saved, with or without the preselection of samples. Creating a job from a template follows the same wizard process, but the details and tasks are prepopulated.
- At the top of the job creation page, click Choose Job Template.
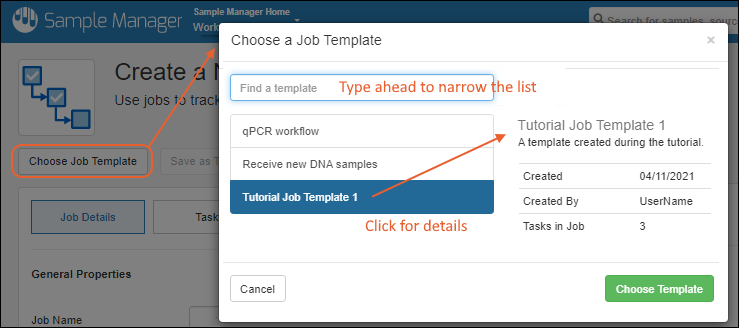
- Find the template you want to use - typing ahead will narrow the options.
- If you have already defined any tasks before applying a template, you will be warned that the template will override any existing information in your job. Cancel to retain your current tasks.
- Click to see details for any template, including creation details, number of tasks, and the description.
- Click Choose Template.
When a template is applied, the template tasks will be prepopulated in the job wizard. You will see a
From Template section on the
Job Details. You can click
in the banner to remove the template if desired.

Add Job Details and Priority
The template does not prepopulate the
Job Details and Priority panel; complete it as when you are creating a job without a template
as described above.
Define Job Tasks
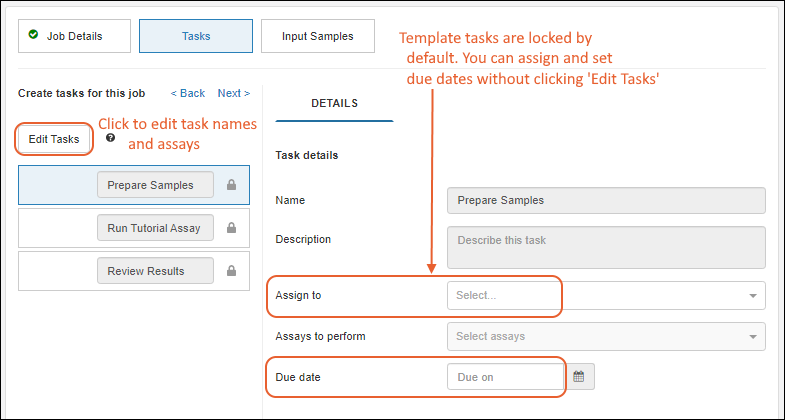
The job tasks from the template are prepopulated in the job creation wizard. By default these tasks are locked. You can assign tasks to users and add due dates without editing tasks.
If you want to make any changes in the tasks for this job, click
Edit Tasks and edit using the same interface as when you create tasks without a template. Note that editing job tasks will remove the template association from the job details.
Complete Wizard
When you are defining a job starting from a template, the section for
Input Samples is the same as
above for creating a job that did not start from a template.
When you have completed all the sections of the job creation wizard, you have the same options for finishing as described
above. Your new job created from a template can be used to create a new template, just be sure to give that new template a new name.
Jobs that were created from templates show the template name on the Overview tab of the job details. Click the job name to open the job details, then click the template name to open the template itself.

Related Topics