A notebook template provides a convenient way for researchers to begin their notebook with the sections and boilerplate content needed in your organization. Different types of notebooks for different purposes can be started from customized templates, making it more likely that final work meets the reviewers expectations.
Create New Template
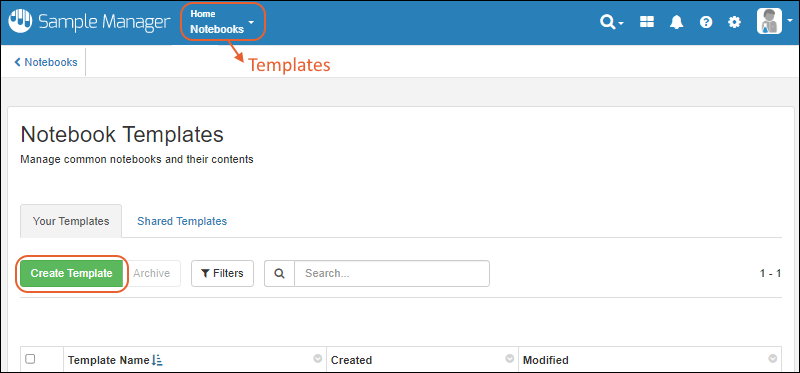
To create a new template from scratch, click
Templates on the main menu under
Notebooks. You can also select
Manage > Templates from the
Notebooks Dashboard.
Click
Create Template.
Enter the template name and description. Use the dropdown to select the co-author(s).
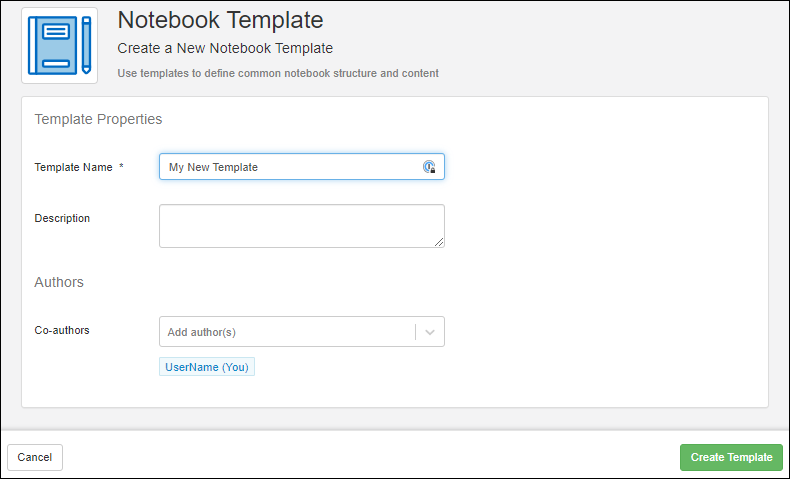
Click
Create Template.
On the next screen, you can begin adding the starter content you want notebooks created from this template to contain.
Click Shared to share with the team, otherwise it will be private and usable only by the author(s).
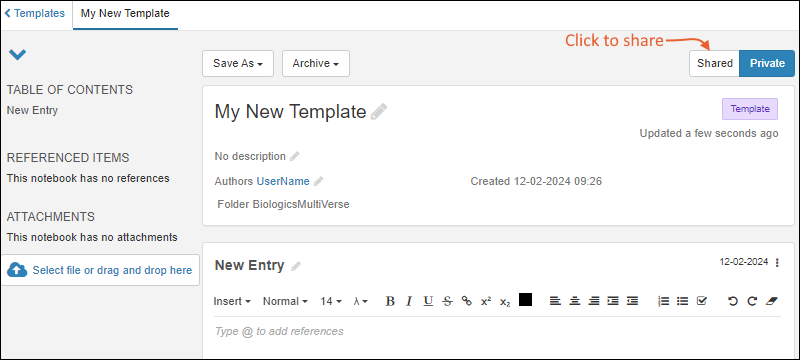
Continue to add the content you want to be included in your template. Learn about creating, naming, populating, and arranging Entry panels, references, attachments, and custom fields (if enabled) in this topic:
Any references, attachments, and fields you include in the template will be available in all notebooks created from it. Notebook creators will be able to edit the content, so for example, you might include in a template
directions and formatting for completing a "Conclusions" section, which the individual notebook creator would replace with their actual conclusions.
As you edit the template, saving is continuous; the template will be saved when you navigate away. You can also use the
Save As menu to
save this template-in-progress as another template or
a new notebook.
Shared Templates
To share your template with your team, i.e. everyone with permission to create new notebooks, click
Shared.
 Shared Templates
 will be shown to all team members, both when managing templates and when selecting them to apply to notebooks.
Create Template from Notebook
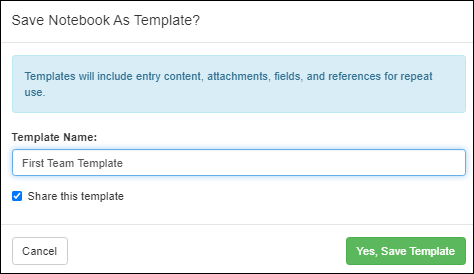
You can also create a new template from an existing notebook. The template will include entry content, attachments, fields, and references for repeat use in other notebooks.
Open the notebook, then select
Save As > New Template.

Give the template a name, check
Share this template if desired, then click
Yes, Save Template.
Create Template from Another Template
While editing a template, you can use the contents to create a new template by selecting
Save As > New Template.

When you save the new template, you decide whether it is private or shared with your team. The setting for the new one does not need to match the setting from the original template.
Create Notebook from Template
To create a new notebook from a template, you have two options.
Starting from the template, select
Save As > New Notebook.

You can also start from the Notebook dashboard by clicking
Create New Notebook. In the first panel, under
Notebook Template, click
Browse Templates.
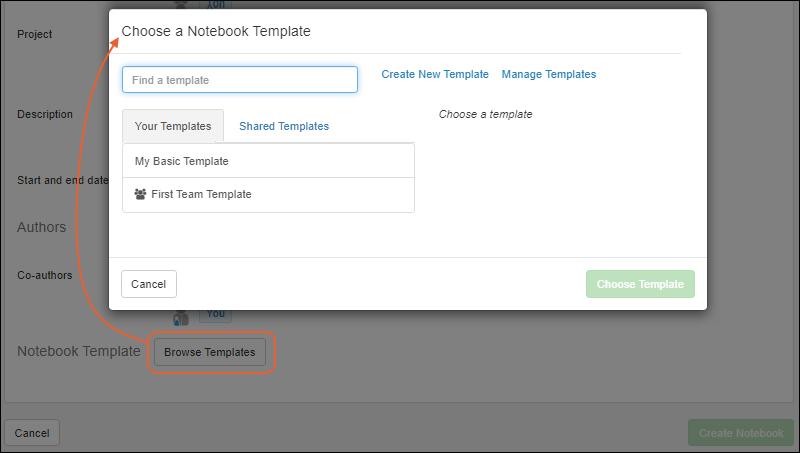
In the popup, locate the template you want to use. Among
Your Templates, shared templates are indicated with the
icon.
Shared Templates authored by others are included on a separate tab.
Proceed to customize and populate your notebook. Note that once a notebook has been created, you cannot retroactively "apply" a template to it. Further, there is no ongoing connection between the template you use and the notebook. If the template is edited later, the notebook will not pick up those changes.
Create a Notebook from Another Notebook
You can create a new notebook from an existing notebook by selecting
Save As > Copy. Copying a notebook will include the value of any custom fields, where using a template does not preserve those values.

Give your new notebook a name, select a tag (the tag of the one you copied is the default), and click
Yes, Copy Notebook to create the new one.
Manage Templates
Open the Template Dashboard by selecting
Templates from the main menu. You can also select
Manage > Templates from the Notebook Dashboard.
- Your Templates lists the templates you have created, whether they are shared with the team or not.
- Shared Templates lists templates created by anyone and shared with the team.
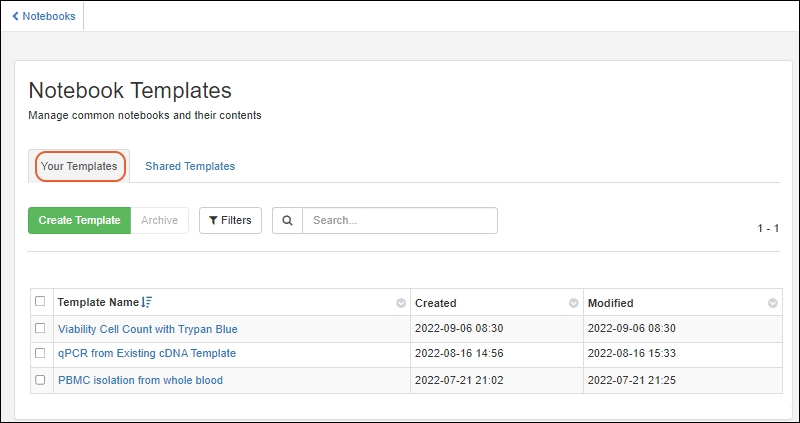
Click the
Template Name to open it. You can use the buttons and header menus to search, filter, and sort longer lists of templates.
Archive Templates
Rather than fully delete a template, you have the option to
archive it, meaning that it is no longer usable for new notebooks. You can select the rows for one or more templates on the Manage dashboard, then click
Archive. You can also open any template and select
Archive > Archive Template.

Immediately after archiving a template, you'll have the option to
Restore it from the template's edit page.

Related Topics