This topic describes how to move Samples from one storage location to another. Samples can be moved within a given storage unit, i.e. to a different position within a structured layout like a box or plate, or the entire storage unit can be moved at once to a new storage location.
To move samples in storage, the user must have been granted the
Storage Editor role. To move entire storage units, i.e. to change the structure of the storage system, the user must have the Storage Editor role in the top level project of the application.
The interface for moving samples is very similar to
that for adding samples to storage originally.
Move One Sample
To move a single sample, you can select
Manage > Move in Storage from the details page.
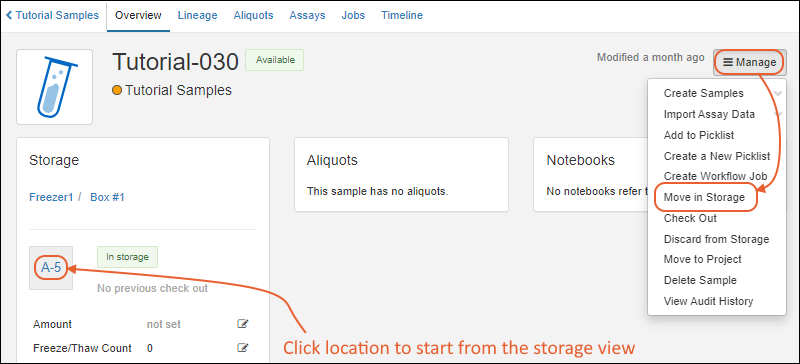
You can also
click the current storage location to begin the move from the Storage View, making it easier to move the sample to another position within a given storage unit.
Move One or More Samples from Grid
Select the sample(s) from any sample grid and select
Storage > Move in Storage. On narrower browsers, this option will be under the
More > menu.

Move Samples From Storage View
Navigate to the
Storage View of the place where the sample(s) are currently stored. If you are starting from the
Sample details page, click the location box in the
Storage Location panel.
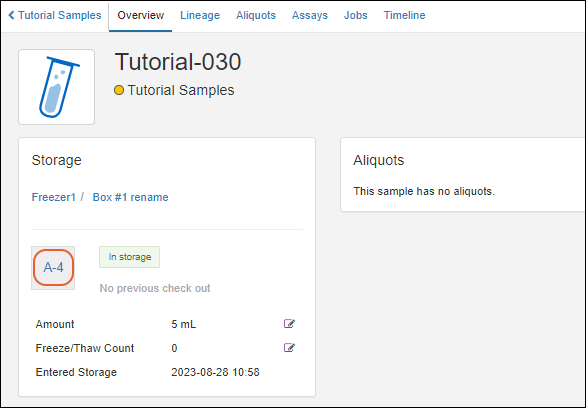
You can also click the
In storage link on the sample grid to go directly there.

From the
Storage View, with the sample(s) selected, you will have a
Move button if you are authorized to move samples.

Select New Storage Location
The popup for moving samples uses the same interface as
originally adding samples to storage. In the first step, you'll select the new storage location. Use the search bar to
find locations by name or label.
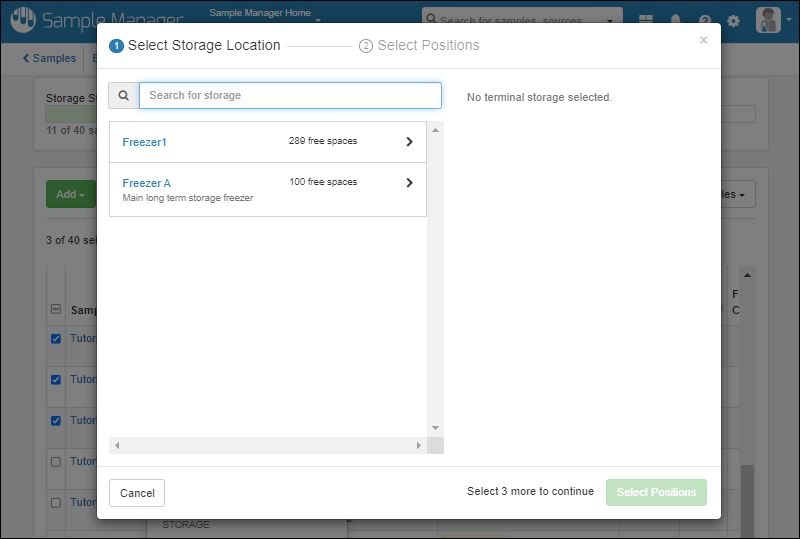
When you start from
the storage view for a group of samples in the same box, plate, or tube rack, the current location will be preselected offering the option to move the selected samples within the same storage unit. You can browse to a new location if desired.
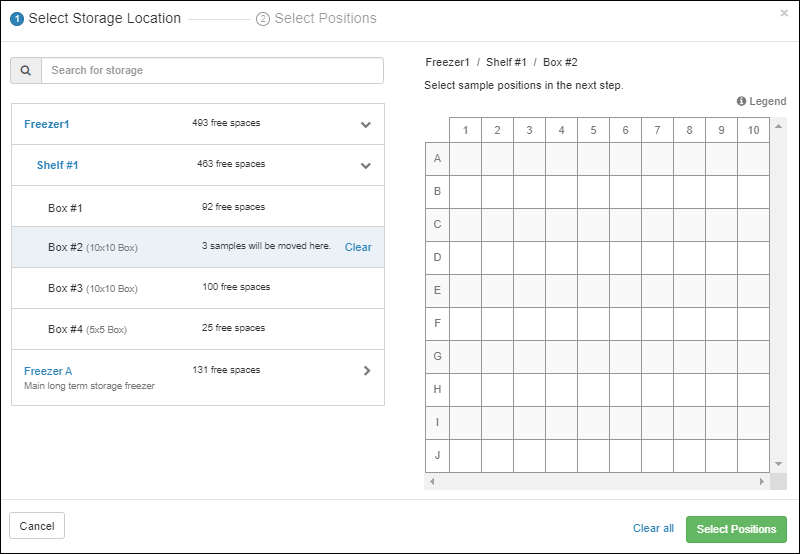
Once you select a location, click
Select Positions. Options to for
manually or automatically placing samples (choosing fill order, starting position, and fill order) are the same as when adding samples to storage originally. The default fill order is to use the
Original Order prior to this move. Adjust the new positions of the samples before clicking
Move to [Type of Storage Unit] to complete the move.

Move Samples to or from Multiple Locations
When selecting new storage locations for a selected group of samples, the same interface applies to adding samples to storage originally, in which if you select a new location that doesn't have room for all the samples you are moving, you'll be prompted to continue selecting additional locations for the remaining samples. Learn more in this topic:
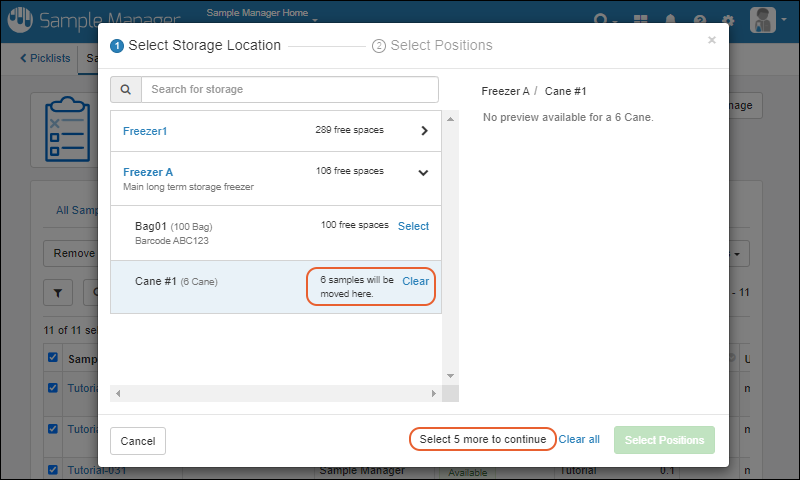
If you want to move a collection of samples that are stored across multiple storage locations, either filter a sample grid to select them by any criteria that will identify them, or build a "Samples to Move"
picklist to create an easy temporary grouping of the samples to move. When in the sample-move interface, you can then select one or more new sample locations as if the current group were not currently stored across multiple locations.
Move a Storage Unit
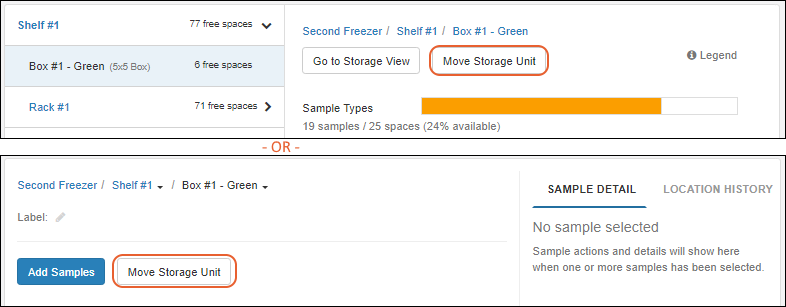
A storage unit can be moved to a new location either in the same storage system or in a different one by clicking
Move Storage Unit. When any storage unit is moved, all the samples, as well as any other storage units contained 'within it' are also moved. When using
multiple projects, moving storage units is only available to users with the Storage Editor role in the top-level project, i.e. the level where the storage system is defined.
View the unit you want to move, either in the storage overview, or the storage view for that unit, then click
Move Storage Unit.
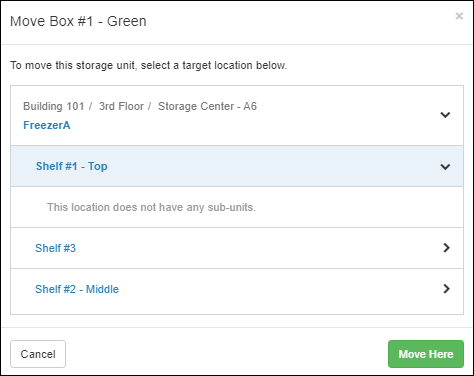
In the popup, use the
to expand the storage list and location hierarchy to find the target location. Select it and click
Move Here.
A success banner will be shown, giving you a quick link to navigate to
View new location. Unless you click it, you will still be in the original storage location where the unit was previously.
- If you move a storage unit containing samples, any samples it contains will stay with the same position assignment(s) within the storage unit.
- See below for an alternative method for moving within a storage system.
Any move of a storage unit will be tracked as a "Storage Event" on the timeline for all the samples it contains. Learn more in this topic:
View Storage Activity
Move Within Current Storage: Edit Definition Method
If you are moving a storage unit within a storage system, you can also edit the definition to relocate that box to its new location, as described here:
Open the storage details page by clicking the name on the main menu.
- Select Manage > Edit Storage Definition.
- Click the Storage Hierarchy section.
- Use icons to expand sections.
- Lock icons are shown on any storage units containing samples, indicating that you cannot change the size or type of the units, but you can move them within the storage here.
- Locate the storage unit you want to move. Shown below, Box#1 - Green" used to be on Shelf #2/Rack #1 and is being moved to Shelf #1.

- Click Finish Updating Storage.
Learn about how a move event is tracked for samples in this topic:
View Storage Activity
Change a Storage Unit Type
In order to change the type of a storage unit, such as to change the size or layout of a box, you can edit the storage hierarchy prior to storing any samples in the unit. Once samples are stored, however, you cannot edit the unit type, but instead need to accomplish this change as a sample move. First create the new storage unit, then move the samples to it. In the case of moving samples from a smaller to a larger box, you could choose to maintain the row and column layout positions, but this is not required. The new unit can be in a different storage location or could be in the same location as the previous unit.
Note that while this operation is recorded as a move for the samples, there is no "location history" connection between the original box and the different sized box.
Related Topics