Create as many digital storage systems in the application as you have physical storage locations. You can have both room temperature and temperature-controlled storage systems such as freezers or incubators. Customize the storage layout, aka
hierarchy, within each digital storage system to match the physical options available to your users.
This topic describes how to define a new storage system from scratch. Once you have created one, you may
copy it to create additional similar storage. Users must have either the
Storage Designer or Administrator role to create and edit storage systems and layouts.
Note that you can only create storage systems in the home (top-level) project. If the creation button is missing, navigate first to the
home project.
Create Storage
To create a new storage system, click
Create Storage on the main dashboard, or from the
Storage option on the main menu.

To create additional storage, you can start from scratch again or you may
copy existing storage.
Storage Properties
Under
Storage Properties define the following:
- Storage Type: Use the selector for either:
- Temperature Controlled (Default) or
- Room Temperature
- Name: Any string name that will clearly identify the physical storage; it must be unique in the system. You'll be able to search by this name later.
- Label: Optional text description that will be shown with the name. You'll be able to search by this label later.
- Manufacturer (For temperature-controlled storage only): Optional string for the company name or maker of this unit.
- Freezer Model (For temperature-controlled storage only): Optional string for the manufacturer-assigned model number or name. Note that while the name of this field is "Freezer" model, it could also be an incubator holding samples at a non-frozen temperature.
- Temperature (For temperature-controlled storage only): Optionally include the set-point or consistent operating temperature of this storage system when in use. When giving a temperature, specify Celsius or Fahrenheit.
- Physical Location: If any physical locations have been configured, you can specify here where to find this storage system.
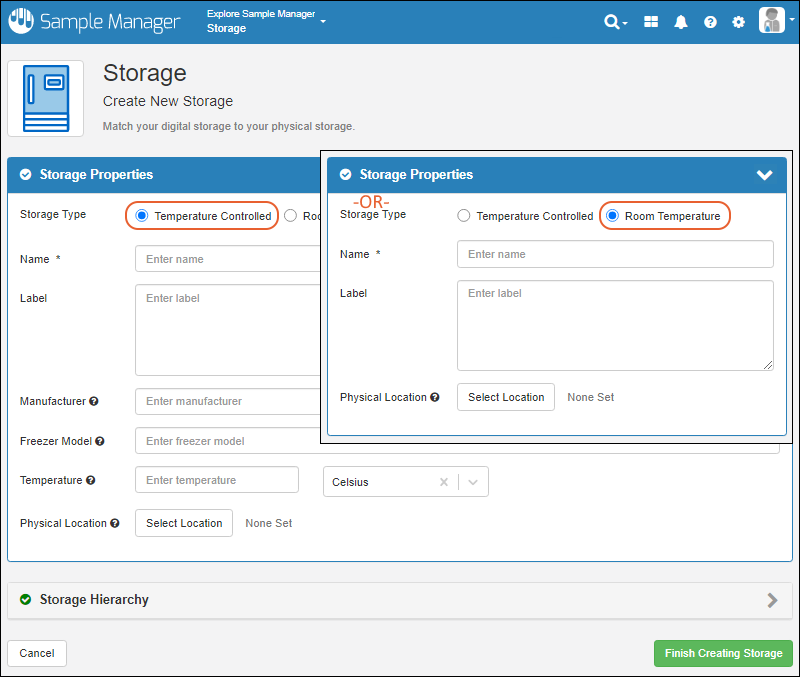
Continue to define additional properties if needed and describe the structure of this storage in the
Storage Hierarchy section before clicking
Finish Creating Storage. You can also return to
edit after saving if you need to make changes to the properties later.
Advanced Storage Settings (For temperature-controlled storage only)
Click
Advanced Settings to set the following properties for temperature-controlled storage. Click
Apply to save any changes.
- Serial Number: Unique identifier for this unit that can be useful for troubleshooting with the manufacturer.
- Sensor Name: If this system is using an alarm or monitor, you can provide the name here.
- Loss Rate: Indicates the time needed or rate at which the unit will return to an ambient temperature from its set-point.
- Status: Used to indicate if the unit is storing samples, available as a backup, or defrosting/cooling/reheating as part of a maintenance routine. Options:

Storage Hierarchy
Click the
Storage Hierarchy section to open it. Add the specific
Storage Units available to the panel on the right, either by:
- Individually dragging them to the proper location in the hierarchy.
- Using Bulk Add to add many storage units at once.
There are two categories of storage unit available:
- Non-Terminal Storage Units : These units can be contained within each other in any combination, but cannot directly contain samples. For example, a shelf can have a rack which has 2 shelves, but there must be a bag, box, or plate on those inner shelves to contain the samples themselves.
- Terminal Storage Units: These units can directly contain samples and cannot contain other units. Note that these units will only appear in the hierarchy interface when one or more types or sizes have been defined.
- Bag
- Box
- Cane
- Plate
- Tube Rack
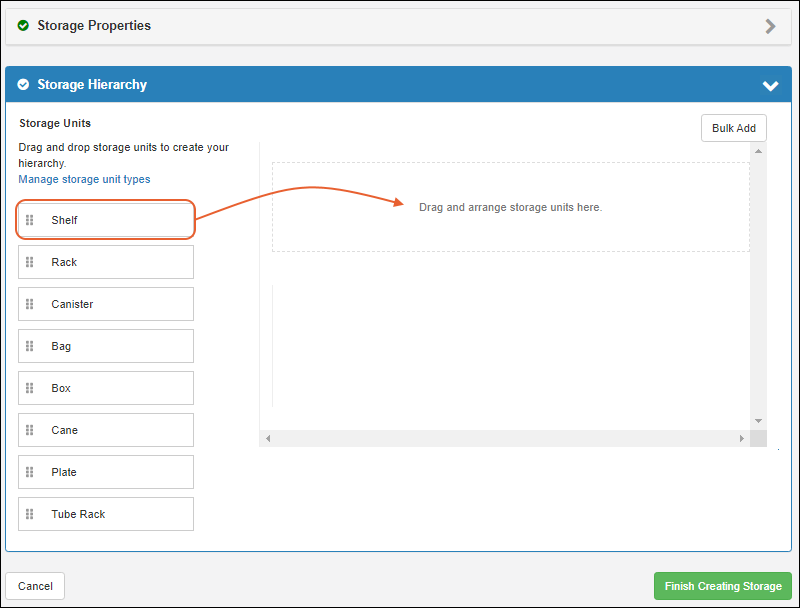
The system includes several built-in types (sizes/layouts), of each kind of terminal storage unit. You can customize the available terminal storage unit selections or add new ones by clicking
Manage storage unit types. Note that your work in progress creating this storage will be lost if you click away now. Consider saving your work and returning to
edit the definition when you have refined the options available.
Add each storage unit, customizing the default
short name if you like, and optionally adding a more descriptive
label.

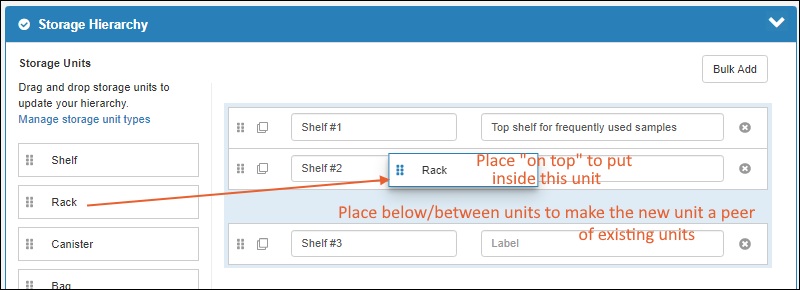
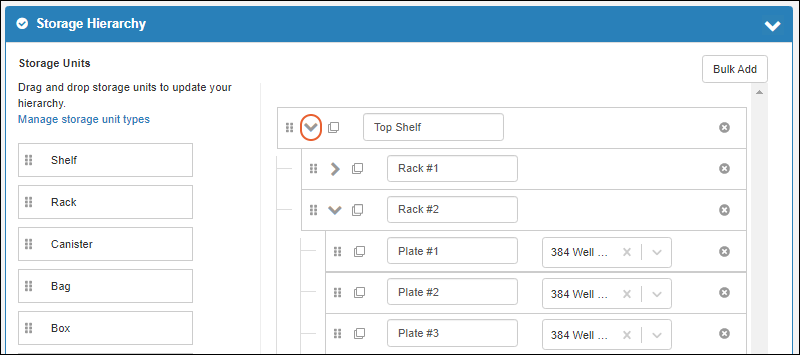
Start with the "large" containment in your storage, then drop structure within that container directly on top in the panel to place it "within" the container. Drag to rearrange them to match the physical storage system. For example, in this image there are three shelves, and to describe several racks on one shelf, we drop the first rack directly "on" the shelf. If we put it "next to" the shelf, it would be added as a separate rack at the same level as that shelf instead of "within" it.
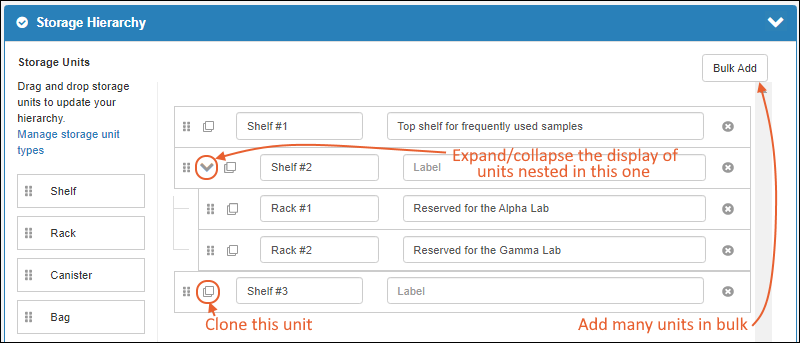
Click the
icon to collapse the display of any nested units - it will become a
you can use to expand the display again. To speed creation of repetitive hierarchies, you can use either:
Continue to add the structures and terminal storage units that will contain your samples. For each terminal storage unit, you also specify the type (size/layout) of the unit.
- Bag: Select bag type from the dropdown.
- Box: Select box type from the dropdown.
- Cane: Select cane type from the dropdown.
- Plate: Select plate type from the dropdown.
- Tube Rack: Select the type of tube rack from the dropdown.
Storage Unit Names
By default, all the storage units you add will be named in a sequential numbering scheme, including the type of storage unit in this name. You can edit these names in any way will help your users find the correct locations, such as position/color/identifying labels you have applied or calling racks "partitions" if that is how your users refer to them. Unit names must be unique at any given level in the hierarchy. It is good practice to use unique names throughout the storage system to avoid confusion, particularly where there are many similar structures.
The name is indexed
making it possible to later search for units by name.
Storage Description Labels
You can include a more verbose descriptive
Label for every level of your storage hierarchy. When present, labels will be shown in many places to help users better identify the specific storage unit. Both as additional text in hierarchy listings, and as hover text when viewing storage location 'pathways' throughout the application.
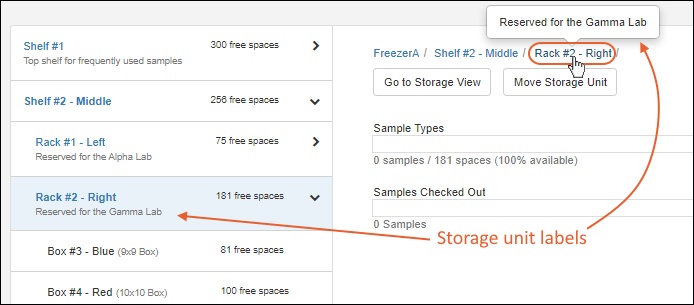
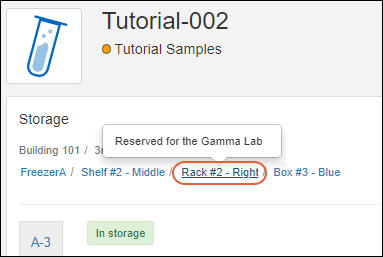
You can add new labels to existing units, or edit labels to update them, either by returning to
edit the definition via this interface, or directly
edit them in the storage view for the unit using the
icon.

The label is indexed
making it possible to later search for units by label.
Clone Units
If you click
, you can clone a unit that contains other nested units. The entire structure will be cloned at the same level as the parent. This can speed the process of describing a repetitive storage hierarchy.
Finish Describing Hierarchy
Continue to add elements and rearrange them to describe your storage. Here, there are three shelves. One of the shelves has 2 bags, another shelf has two racks, each with 2 boxes of different sizes.

- Once you have completed your storage hierarchy, click Finish Creating Storage.
- Note that you can return to edit your storage hierarchy later, such as after defining new storage units.
- If any storage names are duplicates within a given hierarchy, an error will be raised highlighting both of the matching names so that you can edit one or both to be unique. No error is raised for duplicate names in different parts of the hierarchy.
After saving, you will see the
Overview page for your storage. Learn more in the topic:
View Storage Details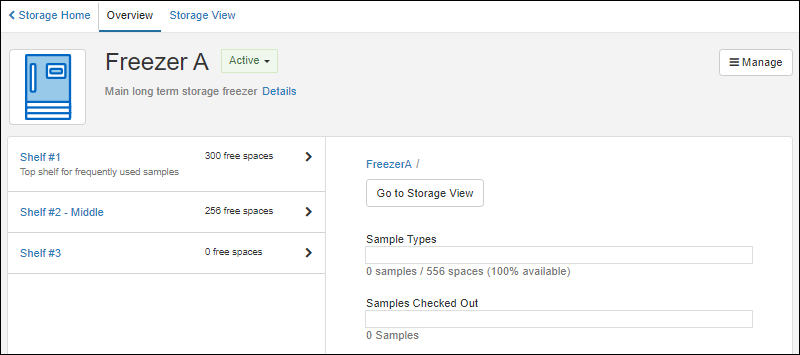
As long as you have included some
terminal storage units such as bags or boxes, you will see how many samples you can now store in it. If not, you will see the message "This location has no terminal storage units configured", with a quick link to
add some.
Bulk Add Storage Units
Instead of
adding all your storage units individually, you can click
Bulk Add to add many at once, streamlining the above drag and drop/copy process. For example, in this example we're adding a shelf that contains 6 racks, each containing 12 plates.
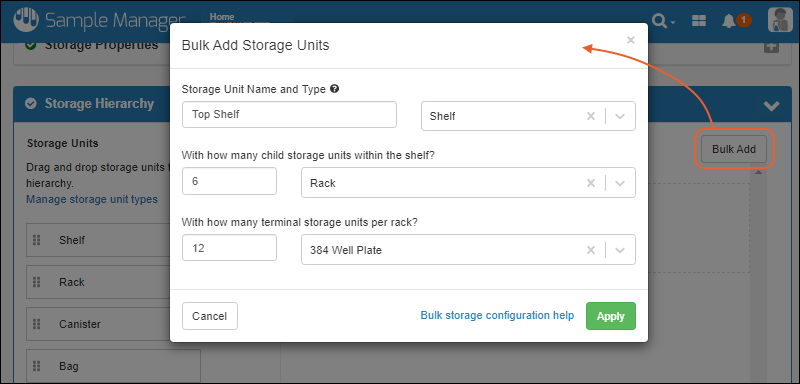
Click
Apply to complete the addition. By default, bulk units are named [unit type] #[number]. No labels are applied. You'll be able to
expand and customize the new units just as if they had been added individually.
Create New Storage Units When Storing Samples
When you are adding samples to storage, you can easily add a new box, bag, cane, plate or tube rack (i.e. any terminal storage unit) from within the Add Samples interface.
Expand the existing storage hierarchy to find where you want to place the new unit. Click the
, then type the name, select the
Unit Type, and optionally include a label.
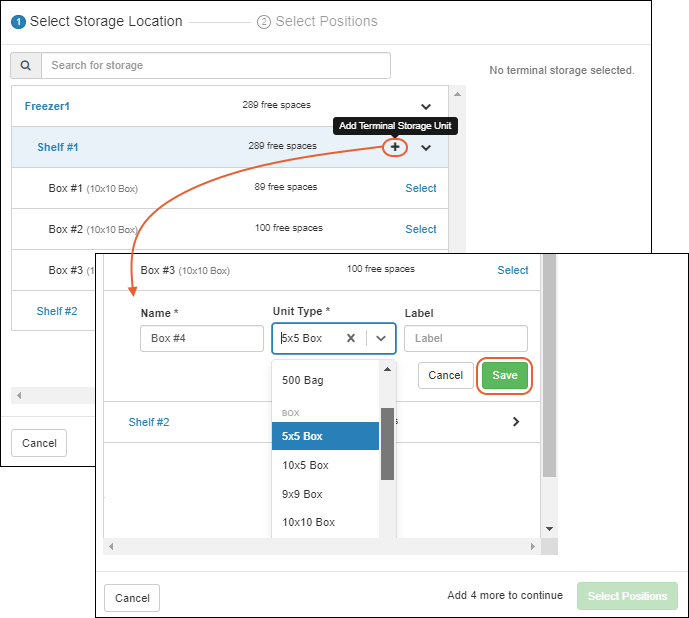
Click
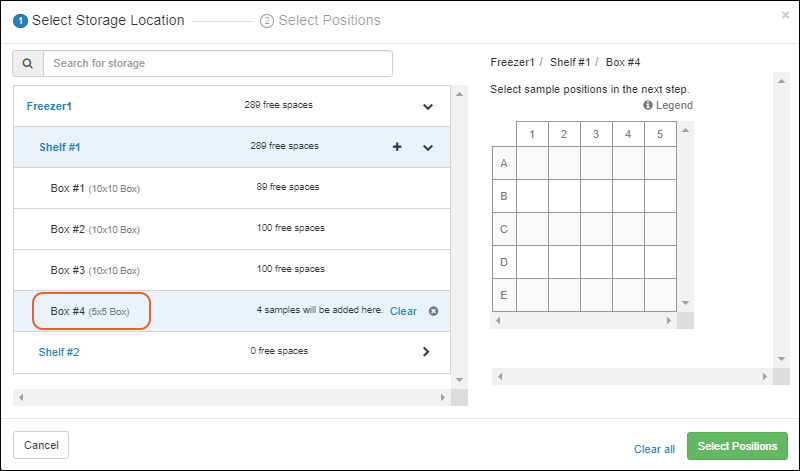
Save to add the new storage unit. The samples you are storing will be placed in it as if it had existed already. Continue to
Select Positions within the new box.
Learn more about storing samples in this topic:
Next Steps
Once you have added at least one storage system that includes some terminal storage locations, you can proceed to
store samples.
Related Topics