Wikis provide an easy way to create web pages and arrange content for users. Both HTML and Wiki syntax pages can be used in combination. In this step we will create a simple wiki for a research team to use as a portal for their research.
Example Page
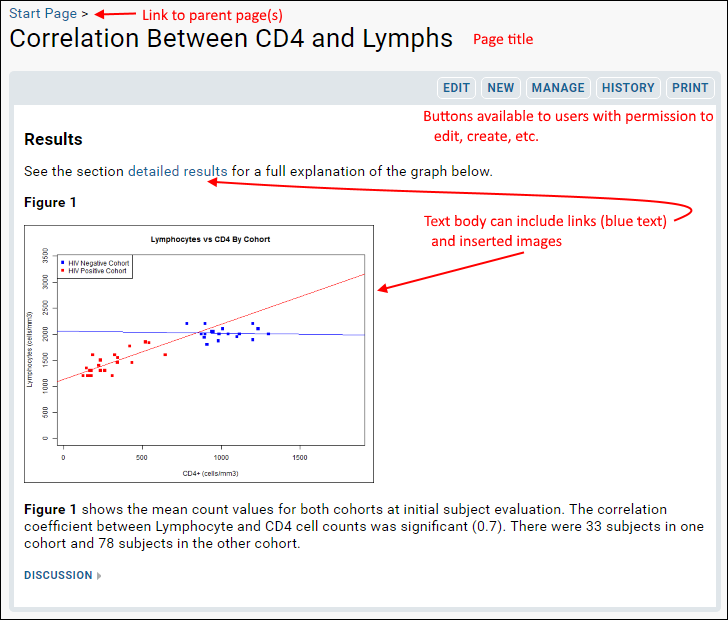
The following example wiki page is shown as an administrator would see it.
- The page includes a title in large font.
- Buttons are shown for editing the page, creating a new one, viewing the history of changes, etc. These buttons are shown only to users with appropriate permissions.
- Links and images can be included in the body of the page.

The following steps will take you through the mechanics of creating and updating wiki pages.
Create an HTML Page
- Navigate to the Start Page tab of your Collaboration Tutorial project.
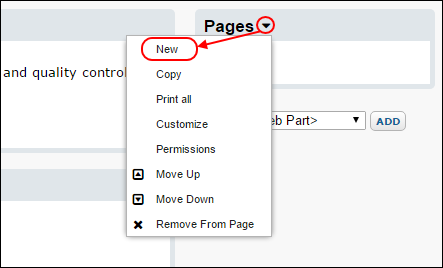
- In the Wiki web part, click Create a new wiki page. If this link is not present, i.e. another wiki already exists in the folder, use the triangle menu for the wiki web part and select New.
- In the New Page form, make the following changes:
- In the Name field, enter "projectx".
- In the Title field, enter "Project X".
- On the Visual tab, enter the following text: "Project X data collection proceeds apace, we expect to have finished the first round of collection and quality control by..."
- You can switch to the Source tab to see the HTML for this simple text page.
- Click Save & Close.
- Notice that the Pages web part in the right hand column shows a link to your new page.
Create a Wiki Page
Wiki pages are written in "wiki code", a simple syntax that is easier to read and write than HTML. Wiki pages are especially useful for composing text and presenting content clearly and simply. When a user calls up your wiki page in a browser, LabKey Server parses the wiki code and renders it as HTML to the user.
- In the Pages web part (on the right when viewing the Start Page tab), click the dropdown arrow, and select New.

- Click Convert To....
- In the Change Format pop up dialog, confirm that Wiki Page is selected, and click Convert. Notice there is only a single panel for the body of text. The "Visual" and "Source" tabs are only used for HTML format pages.
- In the New Page form, make the following changes:
- In the Name field, enter "projecty".
- In the Title field, enter "Project Y".
- Copy the following and paste into the Body field:
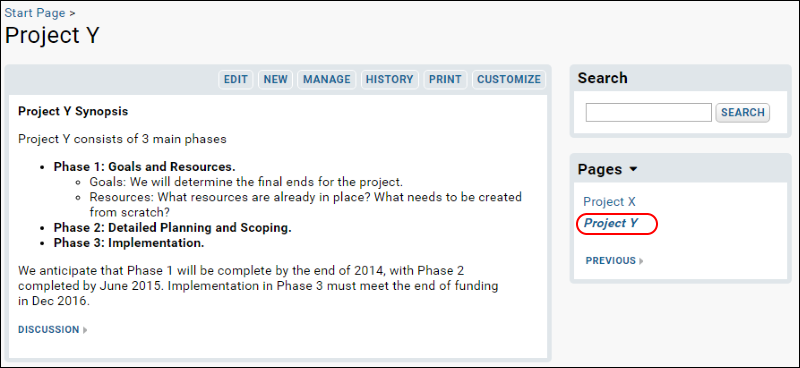
**Project Y Synopsis**

Project Y consists of 3 main phases
- **Phase 1: Goals and Resources.**
-- Goals: We will determine the final ends for the project.
-- Resources: What resources are already in place? What needs to be created from scratch?
- **Phase 2: Detailed Planning and Scoping.**
- **Phase 3: Implementation.**

We anticipate that Phase 1 will be complete by the end of 2014, with Phase 2 \\
completed by June 2015.  Implementation in Phase 3 must meet the end of funding \\
in Dec 2016.
The
** and
- symbols are formatting markup in wiki syntax. A brief guide to Wiki formatting options appears at the bottom of the editing pane. For more information, see
Wiki Syntax.

Notice the menu on the far right (
Pages) now contains two links to the new pages. When you are viewing a page, the title is bolded on this list. As you add pages, links are added to the menu creating a table of contents. You can rearrange their order, and can also arrange your table of contents hierarchically, making some pages "parents", with "children" pages underneath.
- In the Pages web part, click Project Y.
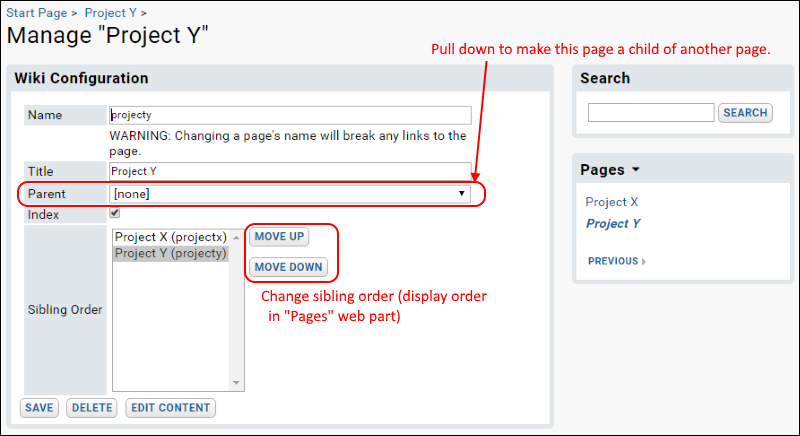
- Click the Manage button.

- Using the Parent dropdown, select "Project X (projectx)". This makes Project X the parent topic for Project Y. Notice Project X is no longer listed as a sibling of Project Y. Sibling pages can be reordered with the buttons.
- Click Save when finished.
- Notice the Pages web part: any parent page now has a small + or - button for expanding and contracting the table of contents.
View the History / Compare Versions
All changes to wiki and HTML pages are tracked and versioned, so you can see how a document has developed and have a record of who made changes. To see these features, first make an edit to one of your pages, in order to build an editing history for the page.
- In the Pages menu, click Project Y.
- Click Edit. (If you do not see the edit link, you may need to log in again.)
- Make some changes and click Save & Close.
- Click History to see the list of edits.
- Click Version 1.
- Click Compare With... and then select Latest Version to see the exact changes made between the two revisions.