 The reagent inventory module may require significant customization and assistance, so it is not included in standard LabKey distributions. Developers can build these modules from source code in the LabKey repository. Please contact LabKey to inquire about support options.
Introduction
The Reagent database helps you organize your lab's reagents. It can help you track:
- Reagent suppliers
- Current reagent inventory and expiration dates
- Current reagent locations (such as a particular freezer, box, etc.)
- Reagent lot numbers and manufacturers
This topic explains how to install and use the Reagent database, which is based on LabKey Server's reagent module.
Installation
Install
- Acquire the reagent module (see note above)
- Stop LabKey server
- Copy the reagent.module file into your /modules directory.
- Restart the server.
Setup
- Create a new folder or navigate to a folder where you'd like to install the reagent database.
- On the folder portal page, choose Query from the Select Web Part dropdown menu and click Add.
- On the Customize Query page, enter the following values:
- Web Part Title: <leave blank>
- Schema: "reagent"
- Query and View: Select the radio button Show the contents of a specific table and view and, from the dropdown menu, select "Reagents".
- Allow user to choose query?: "Yes"
- Allow user to choose view?: "Yes"
- Button bar position: Both
- Click Submit.
- Populate the database with data by navigating to the following URL (substituting <server:port>, <project-name> and <folder-path> with appropriate values):
http://<server:port>/labkey/reagent/<project-name>/<folder-path>/initialize.view
- For example, if you have LabKey Server installed locally, your project is named "myProject" and your folder is named "myFolder", you would navigate to the URL:
http://localhost:8080/labkey/reagent/myProject/myFolder/initialize.view?
Use the Reagent Database
Navigation
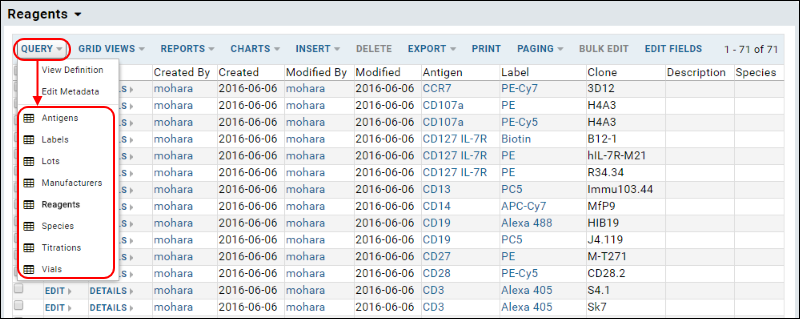
The reagent database contains the following tables:
- Antigens
- Labels
- Lots
- Manufacturers
- Reagents
- Species (holds species reactivity data)
- Titrations
- Vials
Click
Query to navigate between the tables.

Customize Tables
You can add custom fields (for example, "Expires" or "Price") to the
Lots, Reagents, Titrations, and Vials tables.
To add a new field, navigate to the target table, and click
Edit Fields, then click
Add Field
Add New Reagents and Lots
To add new reagents and lots to the database, first you need to add information to these tables:
- Antigens
- Labels
- Manufacturers
- Species (optional)
Navigate to each table above, select
Insert > Insert New Row for each, and enter the appropriate information in the insert forms.
Next navigate to the Reagent table, select
Insert > Insert New Row and use the Antigen, Label, and Species dropdowns to select the data you just entered above. (Note that you can select multiple species values.)
Next navigate to the Lots table, select
Insert > Insert New Row and use the Reagent and Manufacturer dropdowns to select the data.
Add New Vials and Titrations
To add new vials and titrations, first you need to add lot data, then navigate to the vials table and select
Insert > Insert New Row.
Bulk Edits
To edit multiple rows simultaneously, place checkmarks next to the rows you wish to edit, and click
Bulk Edit. Only changed values will be saved to the selected rows.
 The reagent inventory module may require significant customization and assistance, so it is not included in standard LabKey distributions. Developers can build these modules from source code in the LabKey repository. Please contact LabKey to inquire about support options.