This tutorial step returns us to the role of the Specimen Coordinator after a request has been submitted. We will explore the tracking and approval features here.
View and Track Specimen Requests
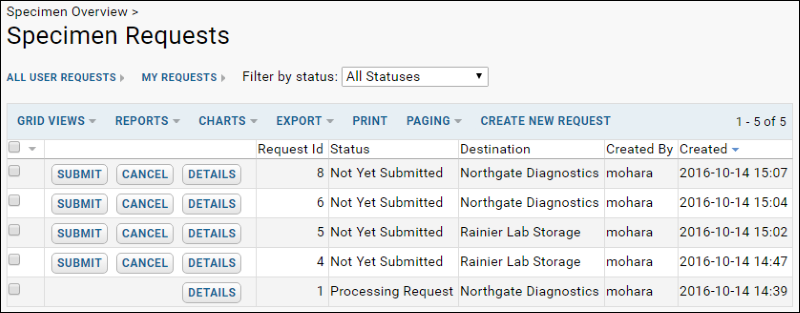
List Current Requests
To access the list of existing specimen requests:
- Click the Specimen Data tab.
- Expand Specimen Requests in the Specimens panel.
- Click View Current Requests.
- You will see a list of existing specimen requests, their current statuses, and options for managing them, depending on your permissions level and the status of the requests.

Filter Requests
You can choose to filter requests by using the
My Requests link and/or
Filter by Status pulldown on the top row. Remember, you can always use LabKey's
sorting and
filtering tools to sort and filter any grid like this one.
Customize Grid
You can also customize this grid, as you can any data grid. See
Customize Grid Views.
Manage an Existing Specimen Request
Select the
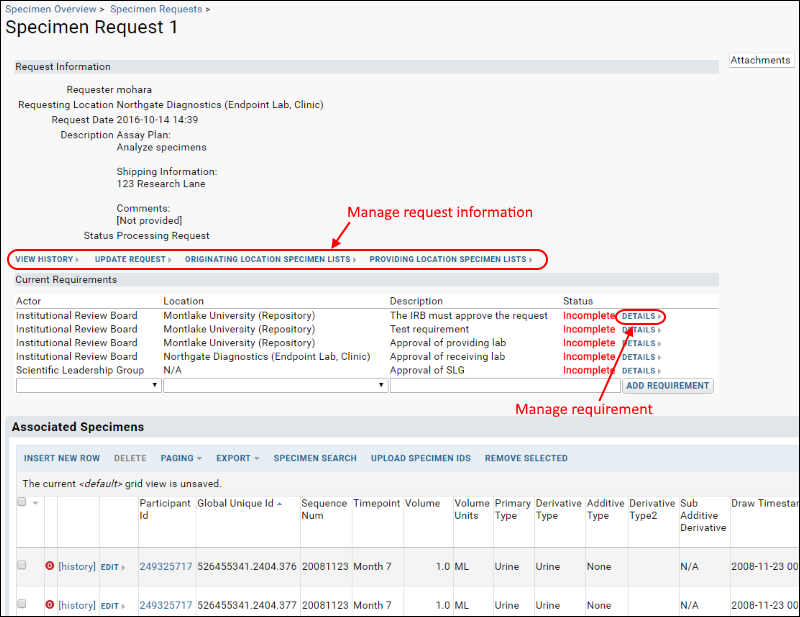
Details link next to any existing request to see the current status of the request. If the request has not yet been submitted, and you have appropriate permissions, you will have options for managing the request.
Request Information
- View History: A list of all changes to the request.
- Update Request: Options for update, including attachment of supporting information.
- Originating Location Specimen Lists: Configure and send email notifications to the location where the specimen was originally drawn or collected.
- Providing Location Specimen Lists: Configure and send email notifications to the location which currently possesses the specimen aliquot and will mail it out after full approval has been granted.

Manage Requirements
The
Current Requirements section lists the current status of all approval requirements associated with this request. Click any
Details link for information and options, including the addition of comments and sending of notifications to the members of the associated Actor.
Use the
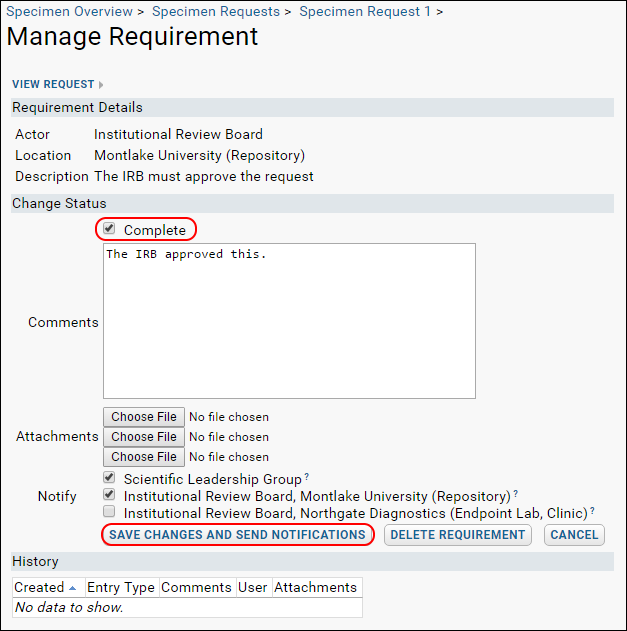
Manage Requirement page to approve specimen requirements. Once all requirements are met, the request can be approved.
- Complete Requirements
- Submit Final Notification for Approval
- Email Specimen Lists to Originating and Providing Locations
- Update Request Status to Indicate Completion
Specimen Request Management Console
- Navigate to the Specimen Data tab of your study.
- Expand the Specimen Requests section of the Specimens web part.
- Click View Current Requests.
- Click the Details button next to the specimen request listing.
Completion of Requirements
Prior to approval, each requirement must be completed by the associated Actor.
- To mark a requirement completed, click on the Details link.
- Check Complete, add any comments, attachments, or additional notifications and click Save Changes and Send Notifications.

Note: Hover over the
? next to any
Notify group to see a list of members. Inactive users are shown with strike through text.
Final Notification Steps for Approval
After all requirements are completed, the list of next three steps will be listed at the top of the specimen request detail page.
- Email specimen lists to their originating locations: [Originating Location Specimen Lists]
- Email specimen lists to their providing locations: [Providing Location Specimen Lists]
- Update request status to indicate completion: [Update Request]
For details on emailing specimen lists to these groups, see
Email Specimen Lists.
Update Request Status to Indicate Completion
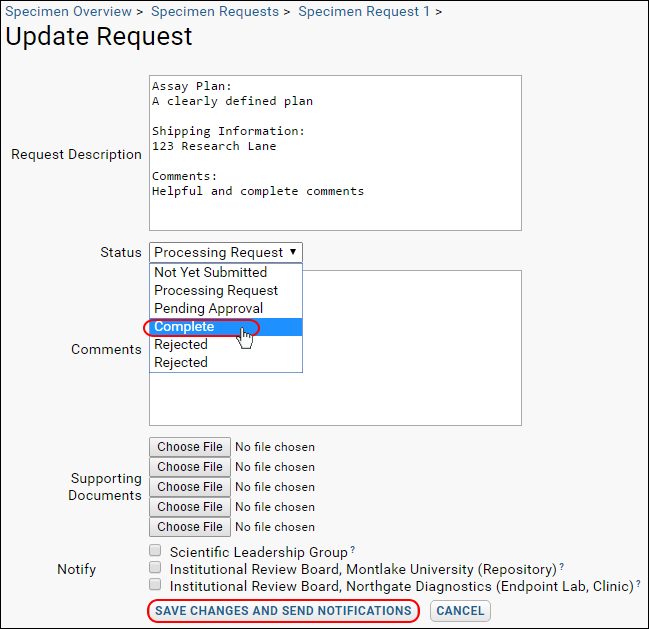
- To finalize the request, click the Update Request link
- Select Complete from the Status drop-down menu.
- Add any supporting documents and select actors to notify.
- Click Save Changes and Send Notifications.

Upon receiving notification of an approved request, the Providing Location would ship the specimens according to their own procedures.
