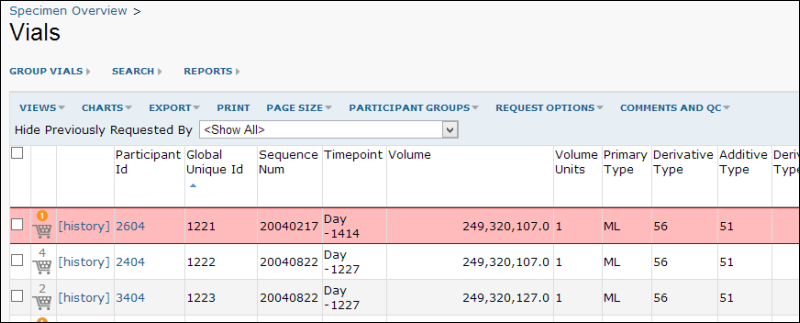
Specimen Quality Control provides row-level flagging of data for quality control during specimen import. Specimens marked for quality control are highlighted in red in specimen grids for all users. After import, flags can be removed or added by the administrator or
Specimen Coordinator.
Guidelines for Flagging
Conflicting information on specimen data will trigger a flag, the conflicting column will be left blank, and the row will have color highlighting. Example flag situations:
- An imported specimen's globalUniqueID is associated with more than one primary type, as could occur if a clinic and repository entered different information pre- and post-shipment.
- A single sample is simultaneously at multiple locations, which can occur in normal operations when an information feed from a single location is delayed, but in other cases may indicate an erroneous or reused globalUniqueID on a vial or other aliquot.
- Conflicting Draw Timestamps are detected. See below for more about this case.
Primary specimens that meet user-specified protocol-specific criteria can also be flagged. Examples of QC problems that could be detected with this method include:
- A saliva specimen present in a protocol that only collects blood (indicating a possibly incorrect protocol or primary type).
- Primary specimen aliquoted into an unexpectedly large number of vials, based on protocol expectations for specimen volume (indicating a possibly incorrect participantID, visit, or type for the specimen).
Note that the tools refer to "vial" for a specimen aliquot, but in the case of tissue blocks or other divisions, the specimen sample may not actually be a vial.
How to Work With Specimen QC Flags
Enable Specimen QC
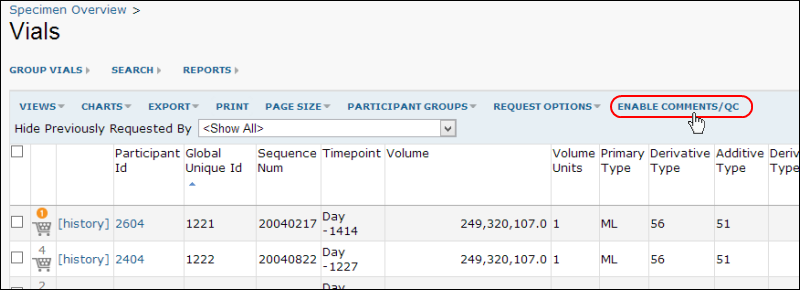
To enable Specimen QC, go to a specimen grid and click the
Enable Comments/QC button.

Review Flagged Vials
You may choose to save a custom grid that filters for vials with the
Quality Control Flag marked
True in order to identify and manage vials that import with conflicts.
Change Quality Control Flags
- After you have enabled specimen QC in a grid, check boxes for specimens of interest.
- Click Comments and QC and select Set Vial Comment or QC State for Selected.
- In Quality Control Flags, change the radio button:
- Do not change quality control state
- Add quality control flag
- If any of the specimens you have selected already have existing comments, you will have the option to replace them, append new comments to them, or leave existing comments unchanged.
- Add Comments if you wish.
- Click Save Changes.
- Return to the grid to see red highlighting on flagged vials:

Review Audit Log
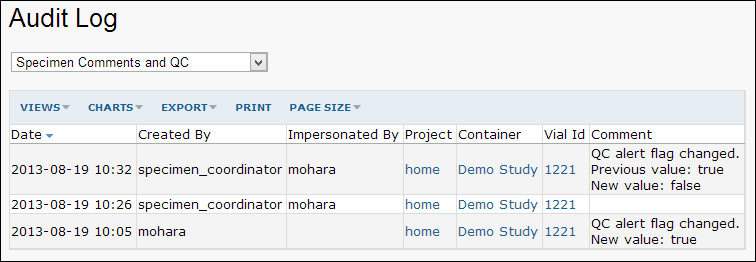
All specimen QC and comment actions are logged in the site audit log.
If you are an admin, you can review the log:
- Select Admin > Site > Admin Console.
- Click Audit Log.
- Select Specimen Comments and QC from the dropdown menu.

Flagging Draw Timestamp Discrepancies
[
14.1 Demo Video: Draw Timestamp Changes ]
The Draw Timestamp for a specimen vial is expected to remain constant over time. However, as specimens are moved among labs sometimes the time portion is lost. Also, occasionally time corrections are made to the repository but it is difficult to change all events associated with a specimen. Whenever the Draw Timestamp differs among events the specimen is flagged with a QC flag and the Draw Timestamp is not shown.
To provide more information about possible discrepancies, upon import to the SpecimenEvent table, the DrawTimestamp field value is used to generate new DrawDate and DrawTime fields in the Vial and Specimen tables (the SpecimenEvent table retains the existing DrawTimestamp field only). QC Flagging will apply individually to the DrawDate and DrawTime fields on the Vial table, allowing the administrator to still import the row but be able to determine whether the discrepancy is significant.
Related Topics
For more information about quality control settings for study datasets, see
Manage Dataset QC States.